
Step-by-step description
The steps below cover both borrower types. Differences specific to Legal Entity borrowers are explicitly marked.
Step 1. Start of the Loan Origination process
What happens: The borrower has already submitted the full application in the previous stage. The platform now sets the application status to Account verification and starts the origination flow.
The borrower portal shows the application as pending — the borrower can open it, see the requested loan conditions, and cancel it at any time.
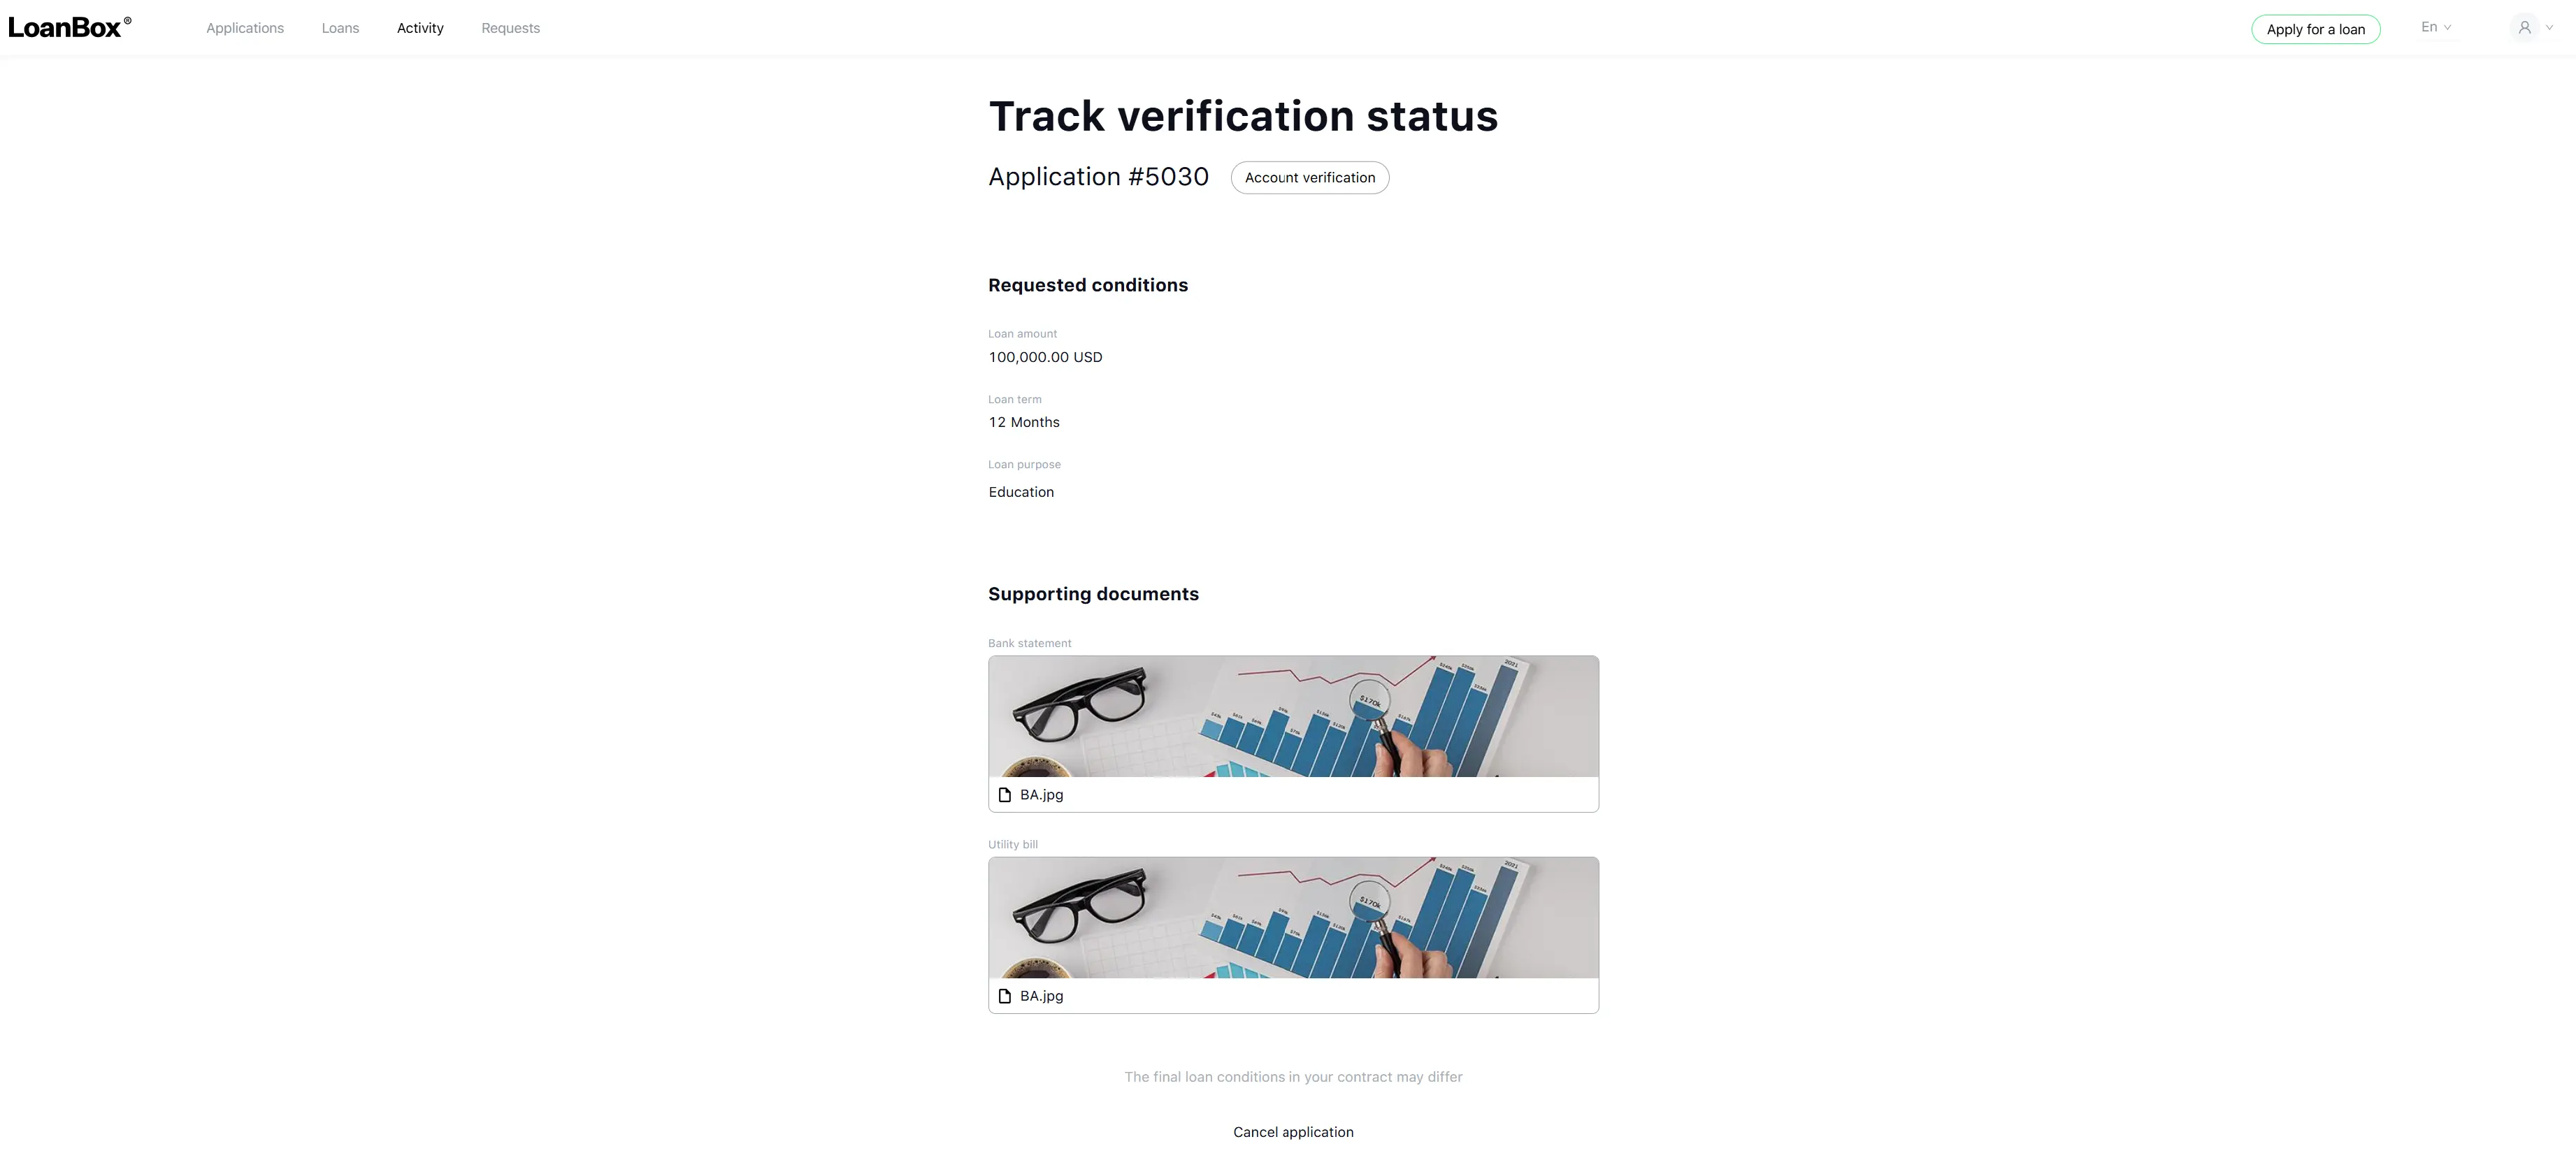
Step 2. Borrower sees the tracking screen
A read-only tracking screen appears in the borrower portal automatically. It refreshes every 10 seconds, so the borrower always sees the current status. The tracking screen contains:
- The status of the application.
- The requested conditions (amount, term).
- The list of supporting documents.
- A note: “The final loan conditions in your contract may differ”.
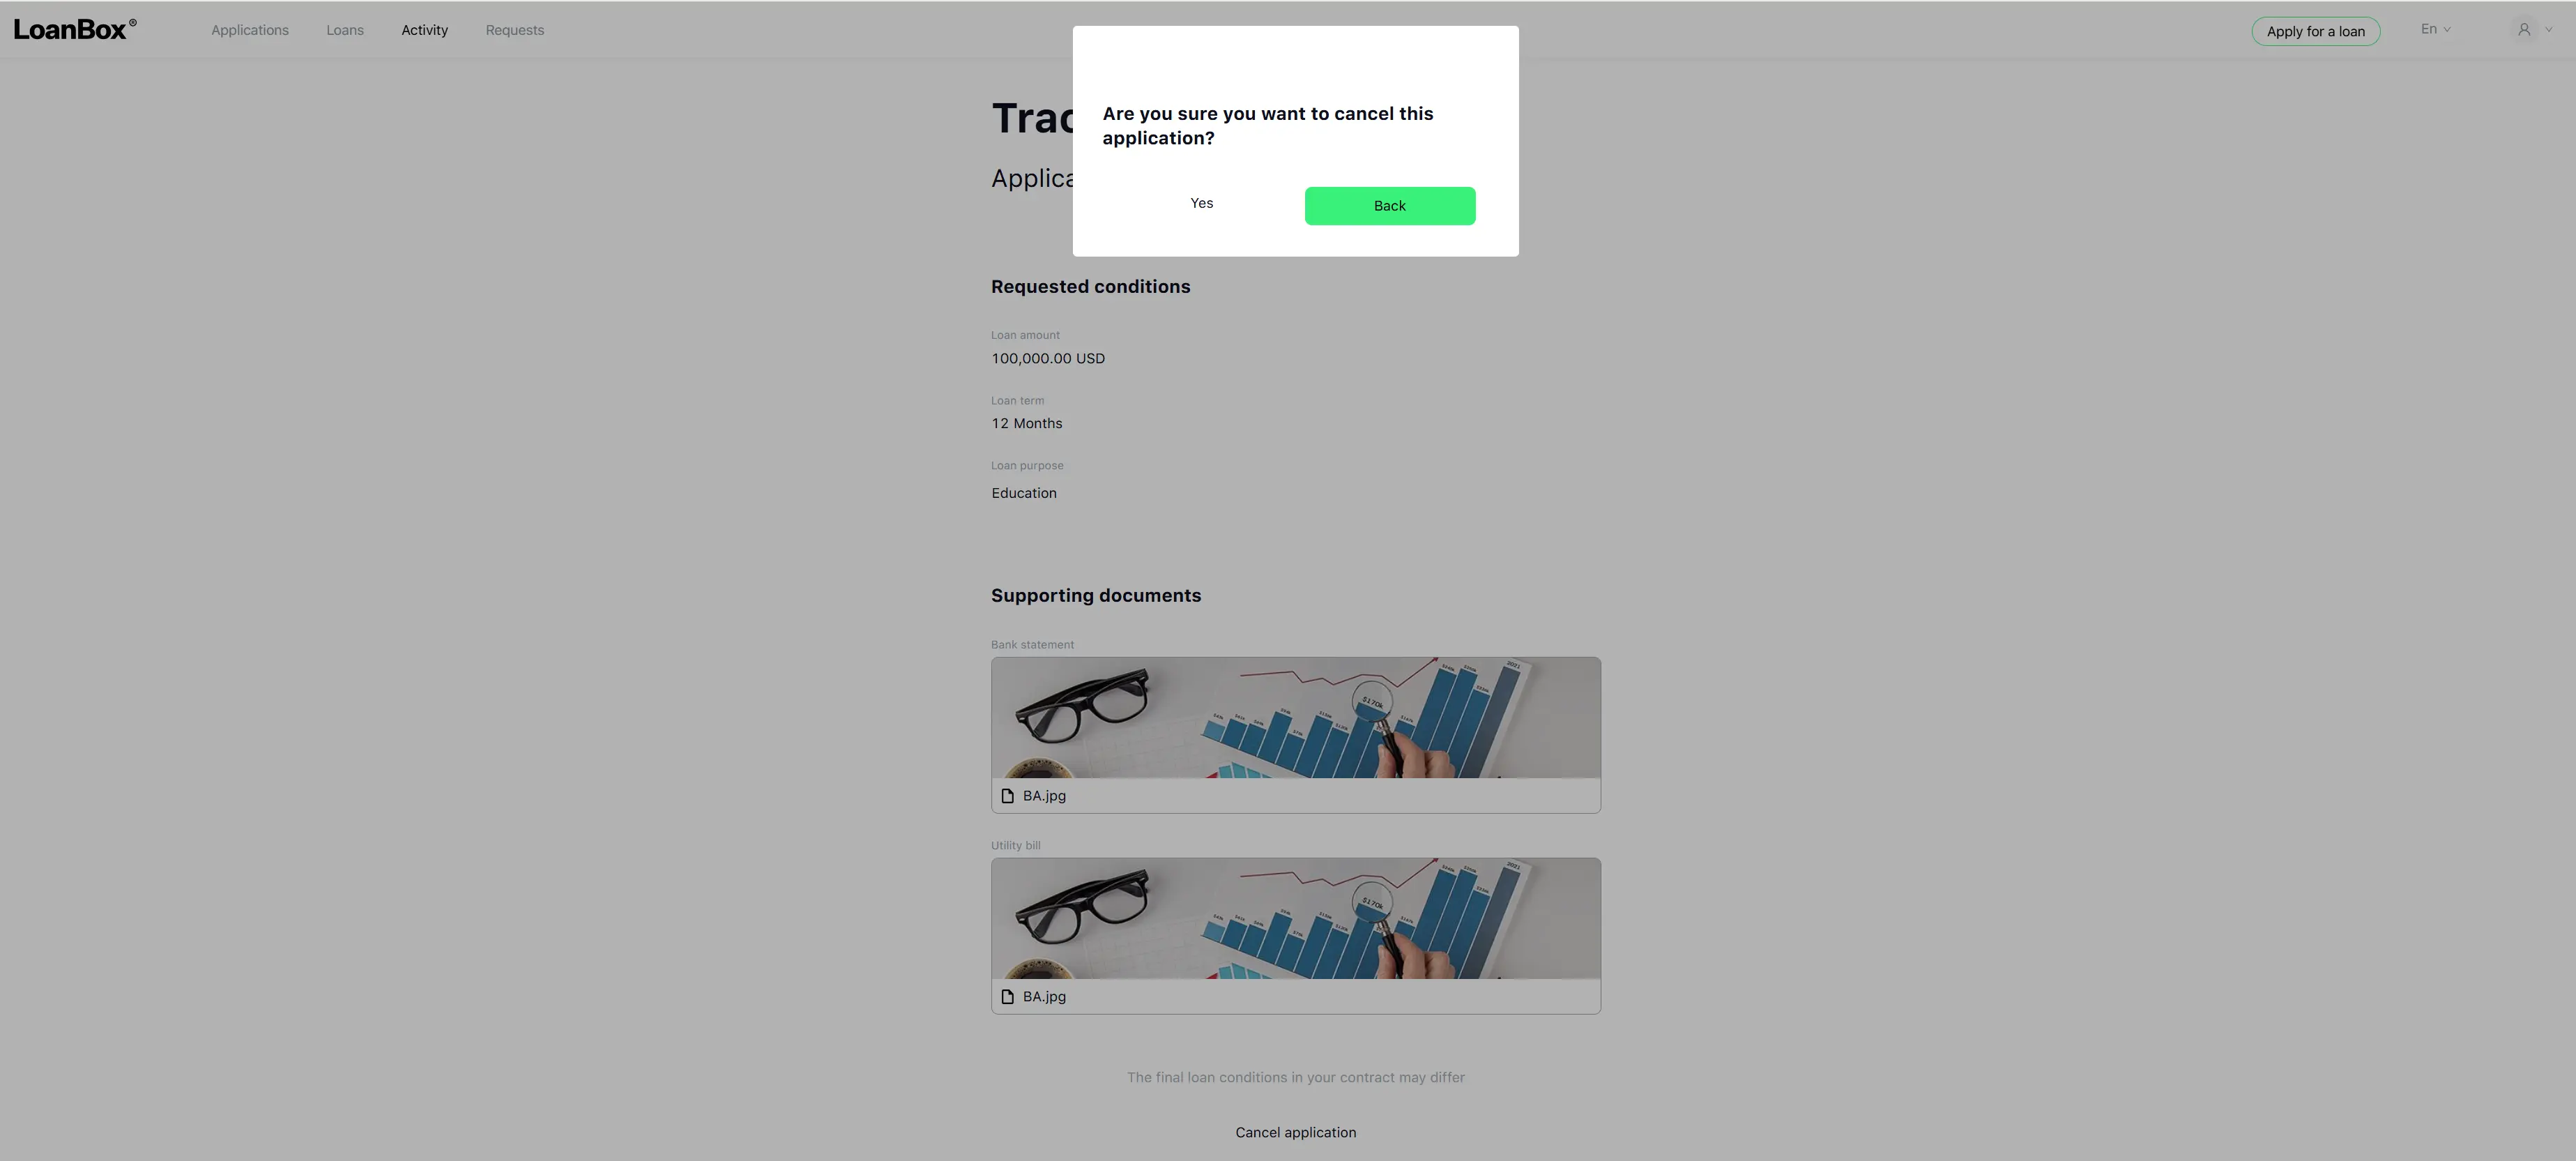
- A Cancel application button (with a confirmation dialog: “Are you sure you want to cancel this application?” — Yes / Back).
If the borrower clicks Cancel application at any moment, the process terminates with the cancel reason “Borrower canceled the application”.
Step 3. Retrieve financial data
What happens: The platform automatically pulls the borrower’s financial data from the connected open banking provider. No user action is required.
If the open banking integration fails, the application is terminated as an error case.
Step 4. Get the credit bureau report
What happens: The platform automatically requests the credit bureau report for the borrower. No user action is required.
Step 5. Run the stop-factor controls
What happens: The platform runs an automated set of checks against blacklists, age limits, residency rules, etc. (the exact list depends on the system configuration).
If any stop factor is triggered, the application is automatically declined.
Step 6. Verification
If the product group’s Verification setting is None, this step is skipped and the process moves on:
- For Person borrowers: directly to step 8 (Score the application).
- For Legal Entity borrowers: to step 7 (Provide financial data).
If the setting is Manual, a back-office verifier opens the Verify the Application task. See the Tasks during the process page for the full list of fields available on this task.
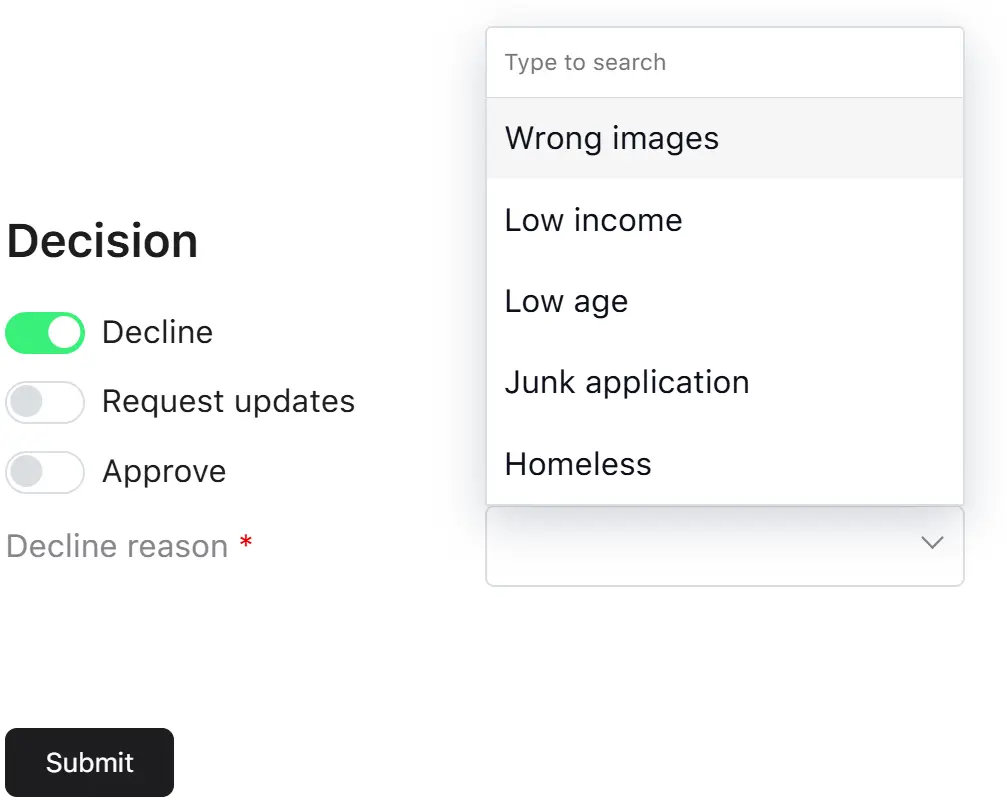
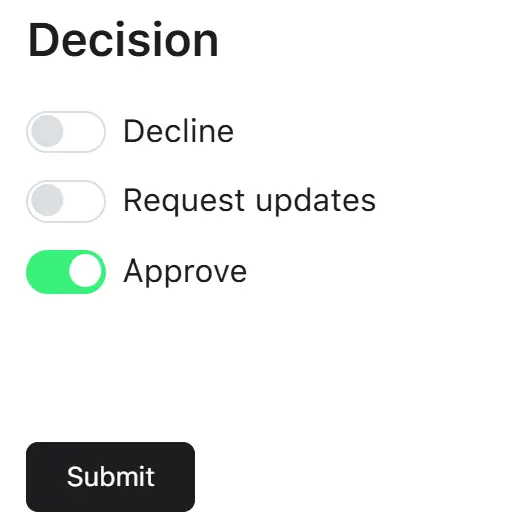
The verifier can choose one of three outcomes:
- Approve — the application moves on to the next step. For Person borrowers, the platform first records the current date as the collateral valuation date and then proceeds to scoring (step 8). For Legal Entity borrowers, the platform records the collateral valuation date and then opens the Provide financial data task (step 7).
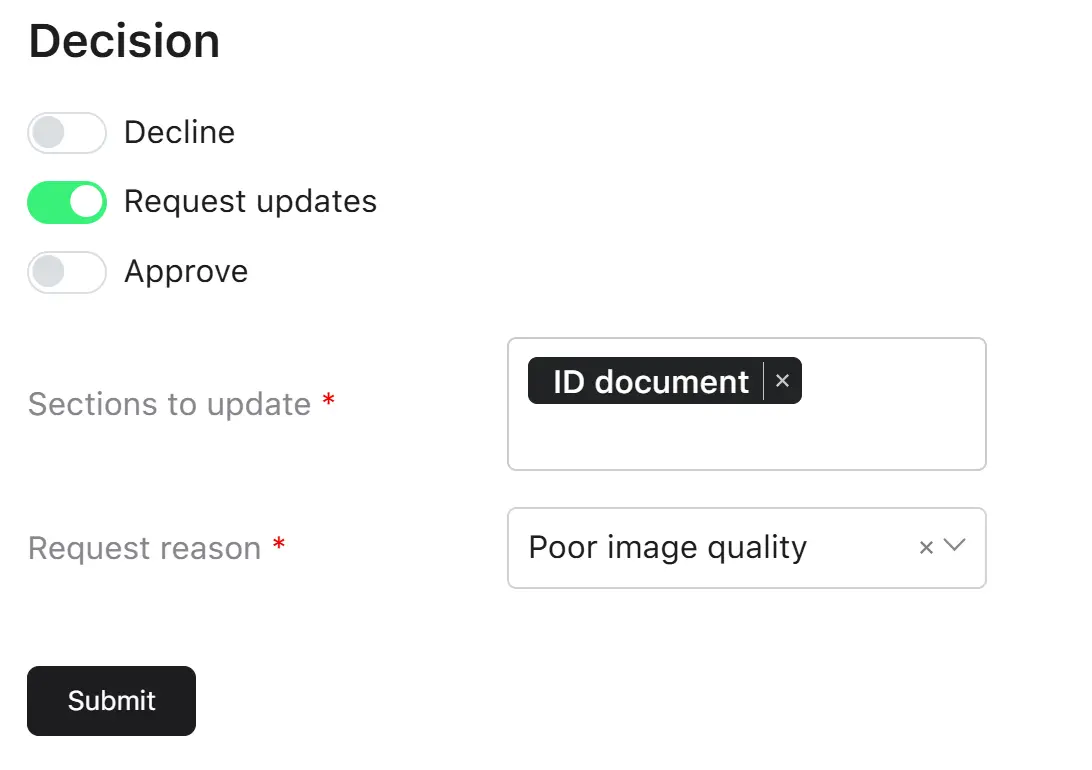
- Request updates — the borrower is asked to update specific blocks of the application (see step 6a below).
- Decline — the application is declined immediately with one of the verification decline reasons.
Step 6a. Update the application loop (only when the verifier selects “Request updates”)
When the verifier requests updates, the following happens:
- The tracking screen in the borrower portal is dismissed.
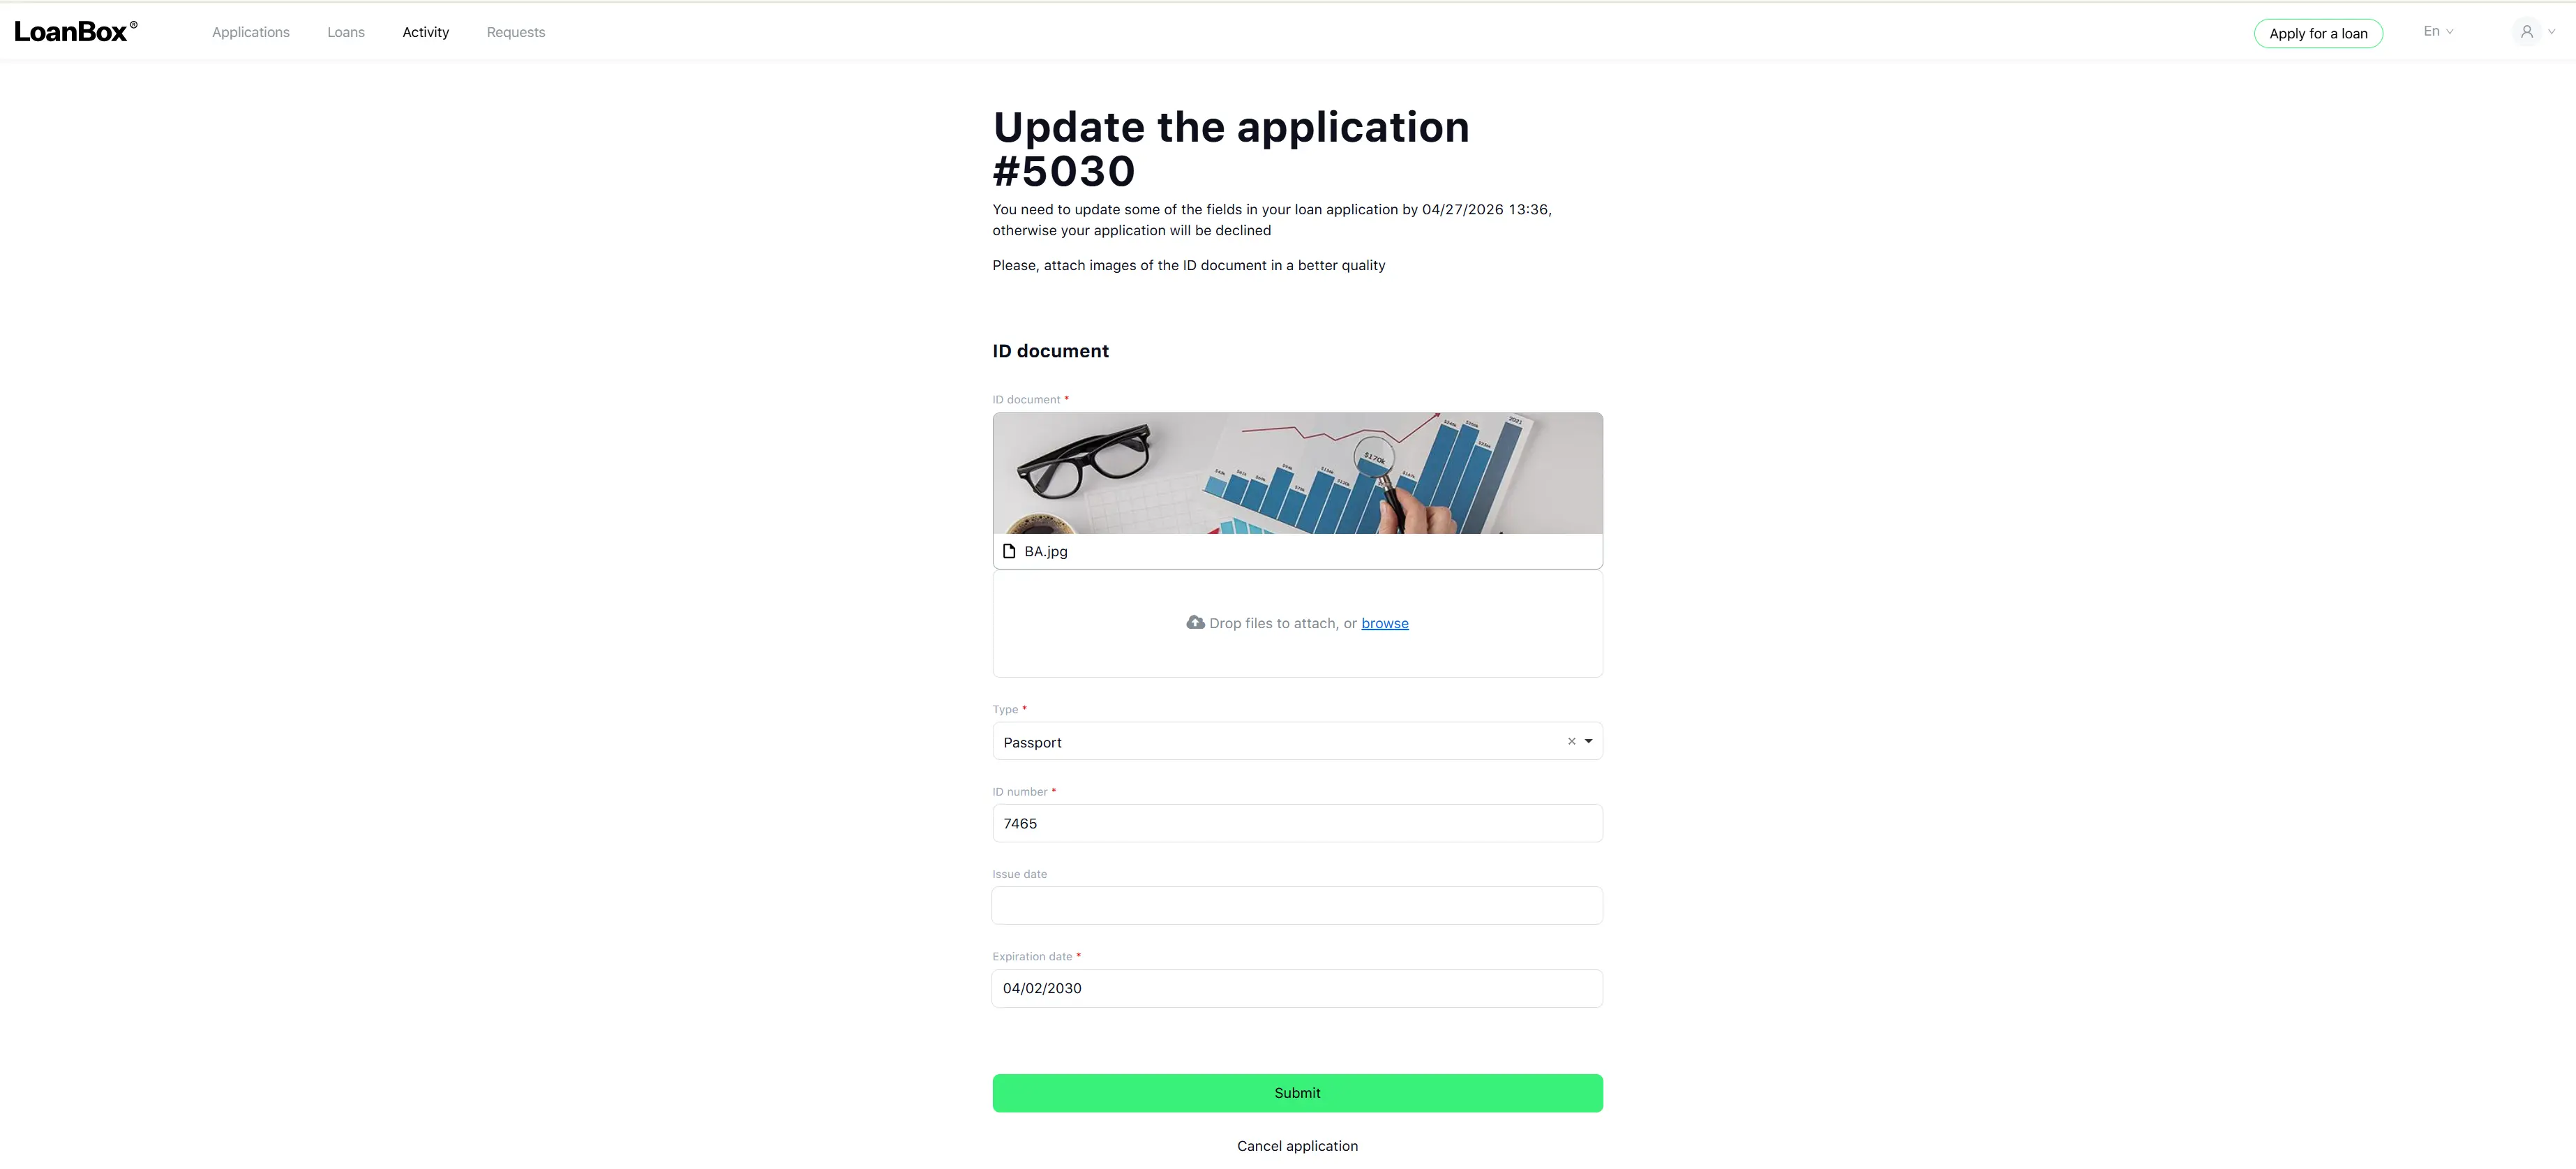
- The borrower receives a notification: “Application returned for revision”.
- The borrower receives a new task in the portal called Update the application, with the message: “You need to update some of the fields in your loan application by [deadline], otherwise your application will be declined”. The deadline is set to 72 hours from the moment the verifier requested updates.
- The borrower edits the requested sections (only the sections selected by the verifier are unlocked) and submits.
- After submission, the platform re-runs the stop-factor controls (step 5) and returns to verification (step 6).
If the borrower does not submit the update within 72 hours, the application is automatically declined.
If the borrower clicks Cancel application on the update screen (with confirmation), the application is canceled.
Step 7. Provide financial data
If the borrower is a Legal Entity, a back-office verifier receives a task called Provide financial data. The verifier manually enters the company’s key financial figures (revenue, profit, total assets, etc.). See the Tasks during the process page for the full list of fields.
After submission, the platform automatically:
- Saves the financial figures on the application.
- Calculates the profitability ratios (gross profit margin, net profit margin, operating profit margin, EBITDA margin, net worth to total assets, net debt to EBITDA).
For Person borrowers, this step does not exist — the platform proceeds directly to scoring.
Step 8. Score the application
What happens: The platform automatically runs the scoring engine. The result is a scoring zone (top / middle) plus a score value.
Step 9. Calculate the credit limit
What happens: The platform automatically calculates how much credit can be approved for this borrower based on the configured limit-calculation rules.
Step 10. Automatic product selection
What happens: The platform tries to find a loan product that matches the borrower’s requested term, amount, and the calculated credit limit. The selected product (or no product) drives the next step’s outcome.
Step 11. Underwriting decision (automatic)
The platform decides what to do next based on the product group’s Underwriting setting and the scoring result (see the table on the What determines the process page). The result is one of:
- Auto-approve — the application is approved on the requested terms (see step 12).
- Send to underwriting — an underwriter must make the manual decision (see step 13).
- Reject — the application is automatically declined (this happens only in Auto mode when no product matches).
Step 12. Auto-approval
What happens: No user action. The platform sets the approved term equal to the requested term, then proceeds to the final approval steps (LTV calculation if there is collateral, prime rate, status set to Approved).
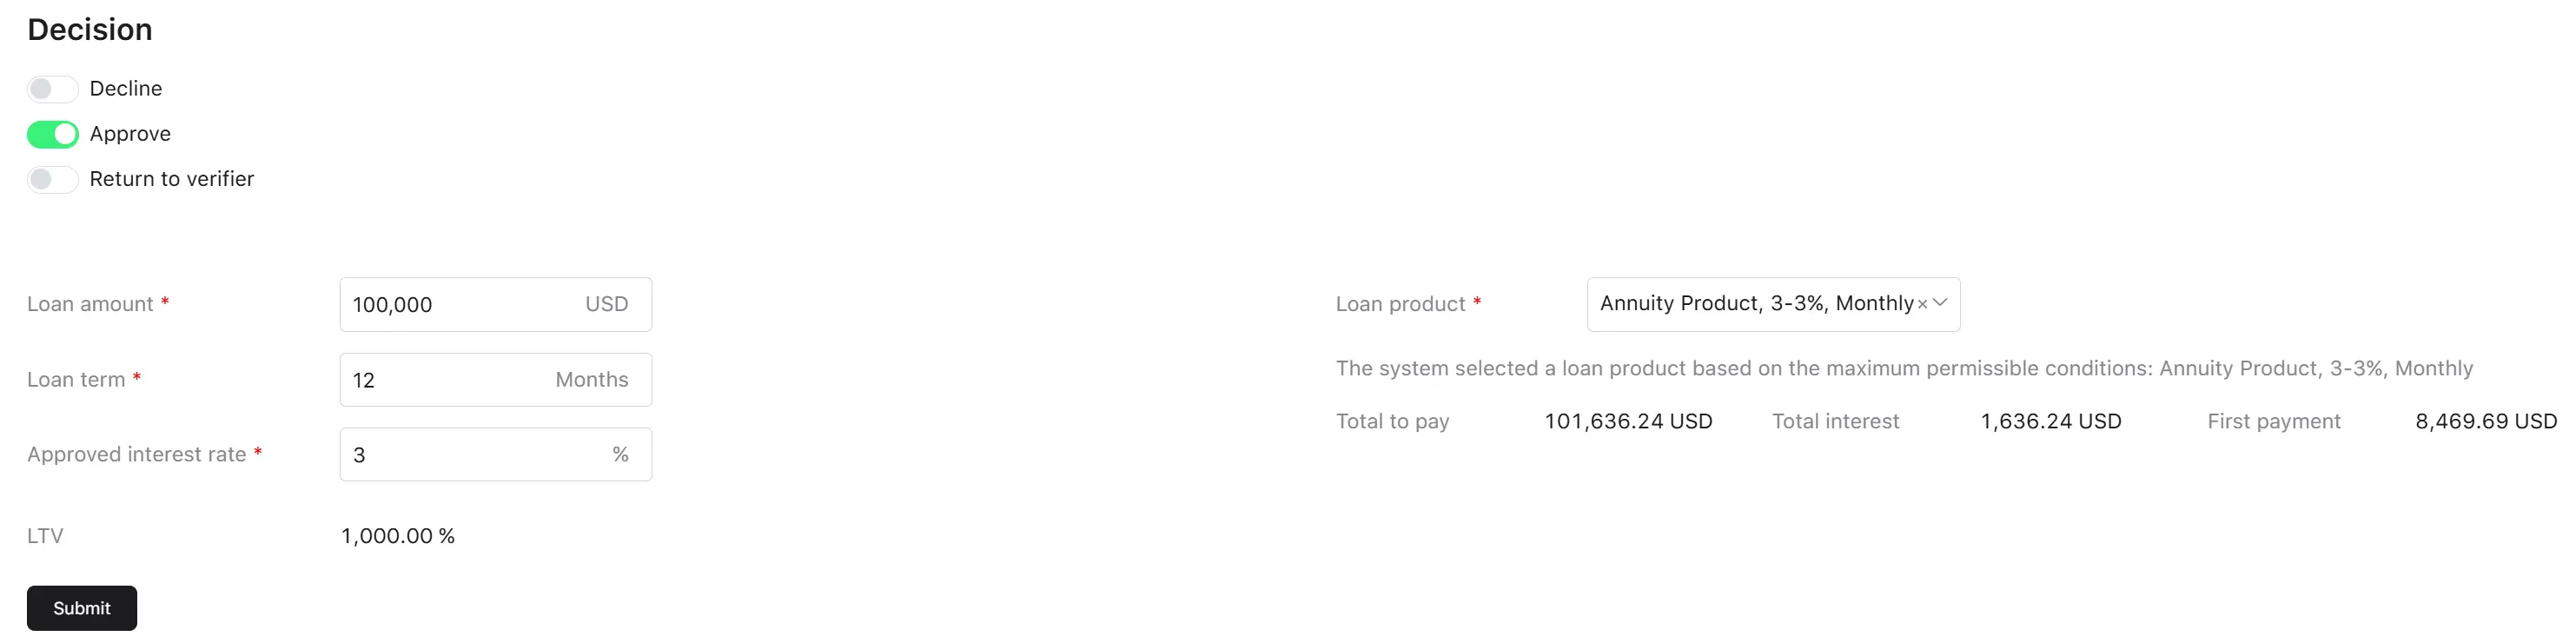
Step 13. Make a decision on the application
A back-office underwriter receives the Make a decision on the application task. See the Tasks during the process page for the full list of fields.
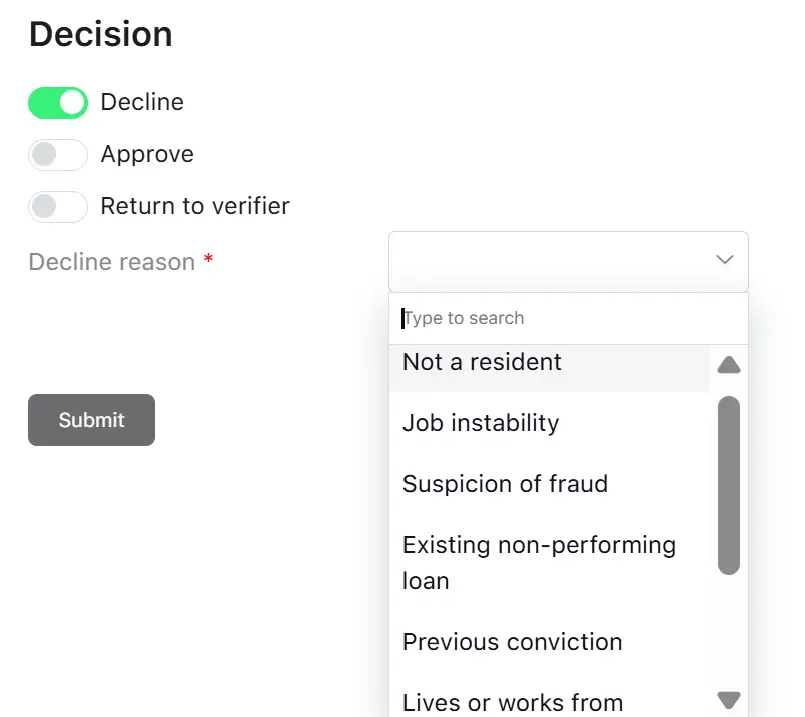
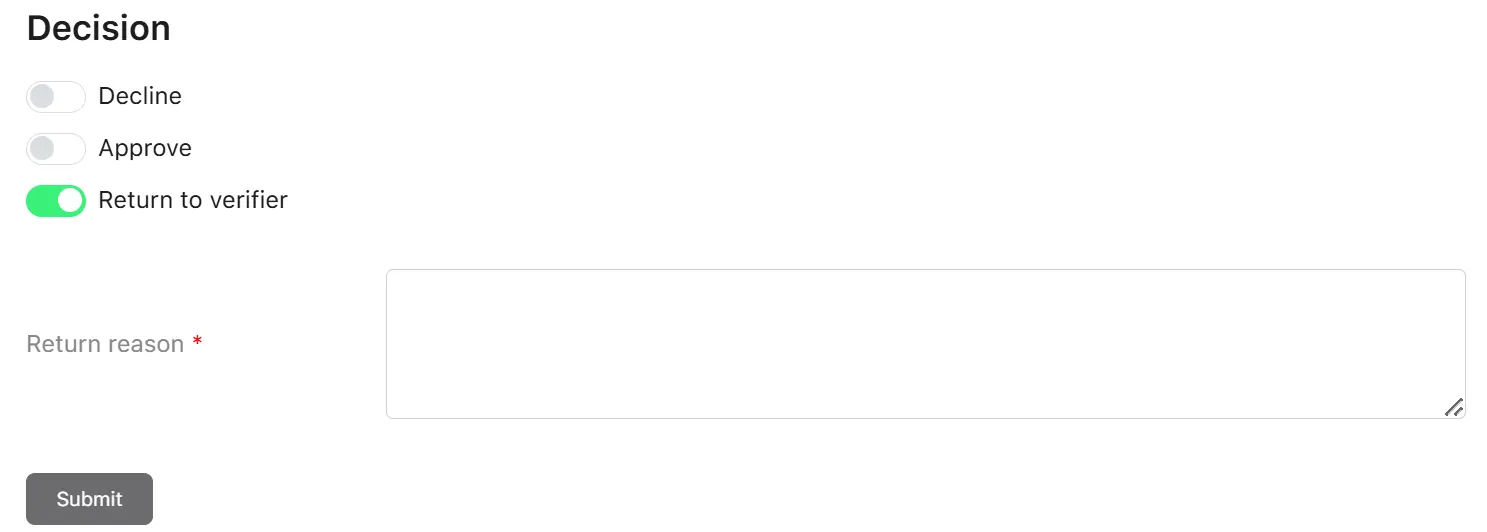
The underwriter can choose:
- Approve — the underwriter sets the final loan amount, term, interest rate, first payment date (when configurable), and the loan product. The application then proceeds to the final approval steps (collateral / LTV, prime rate, status set to Approved).
- Decline — the underwriter selects a decline reason. The application is declined.
- Return to verifier — the underwriter returns the application back to the verifier for re-checking, providing a free-text reason (max 300 characters). This option is available only when the product group’s Verification setting is Manual. The flow returns to step 6.
Step 14. Final approval and amortisation schedule
When the underwriter approves (or when the application is auto-approved):
- If the application has collateral, the platform automatically calculates the loan-to-value (LTV) percentage.
- The platform stores the current prime rate on the application.
- The application status is set to Approved.
- The platform calculates the amortisation schedule (the list of repayment periods).
- The platform validates the amortisation schedule. If the schedule is invalid (interest exceeds payment in any period for non-credit-line, non-PDL products, or the amount to disburse is negative), the application is declined.
- The borrower is notified that the application is Approved (notification is sent to the borrower’s email and phone).
The application then leaves the Loan Origination stage and continues into the contract-signing stage.