Notifications setting
The Notifications setting is the registry of message templates the platform uses to communicate with borrowers and agents. Each notification template is bound to a specific business event and a delivery channel.
A notification template carries the following:
- Event—the business event that triggers the message (e.g., Loan disbursed, Payment date tomorrow).
- Template name—internal name of the template.
-
Channel—delivery channel:
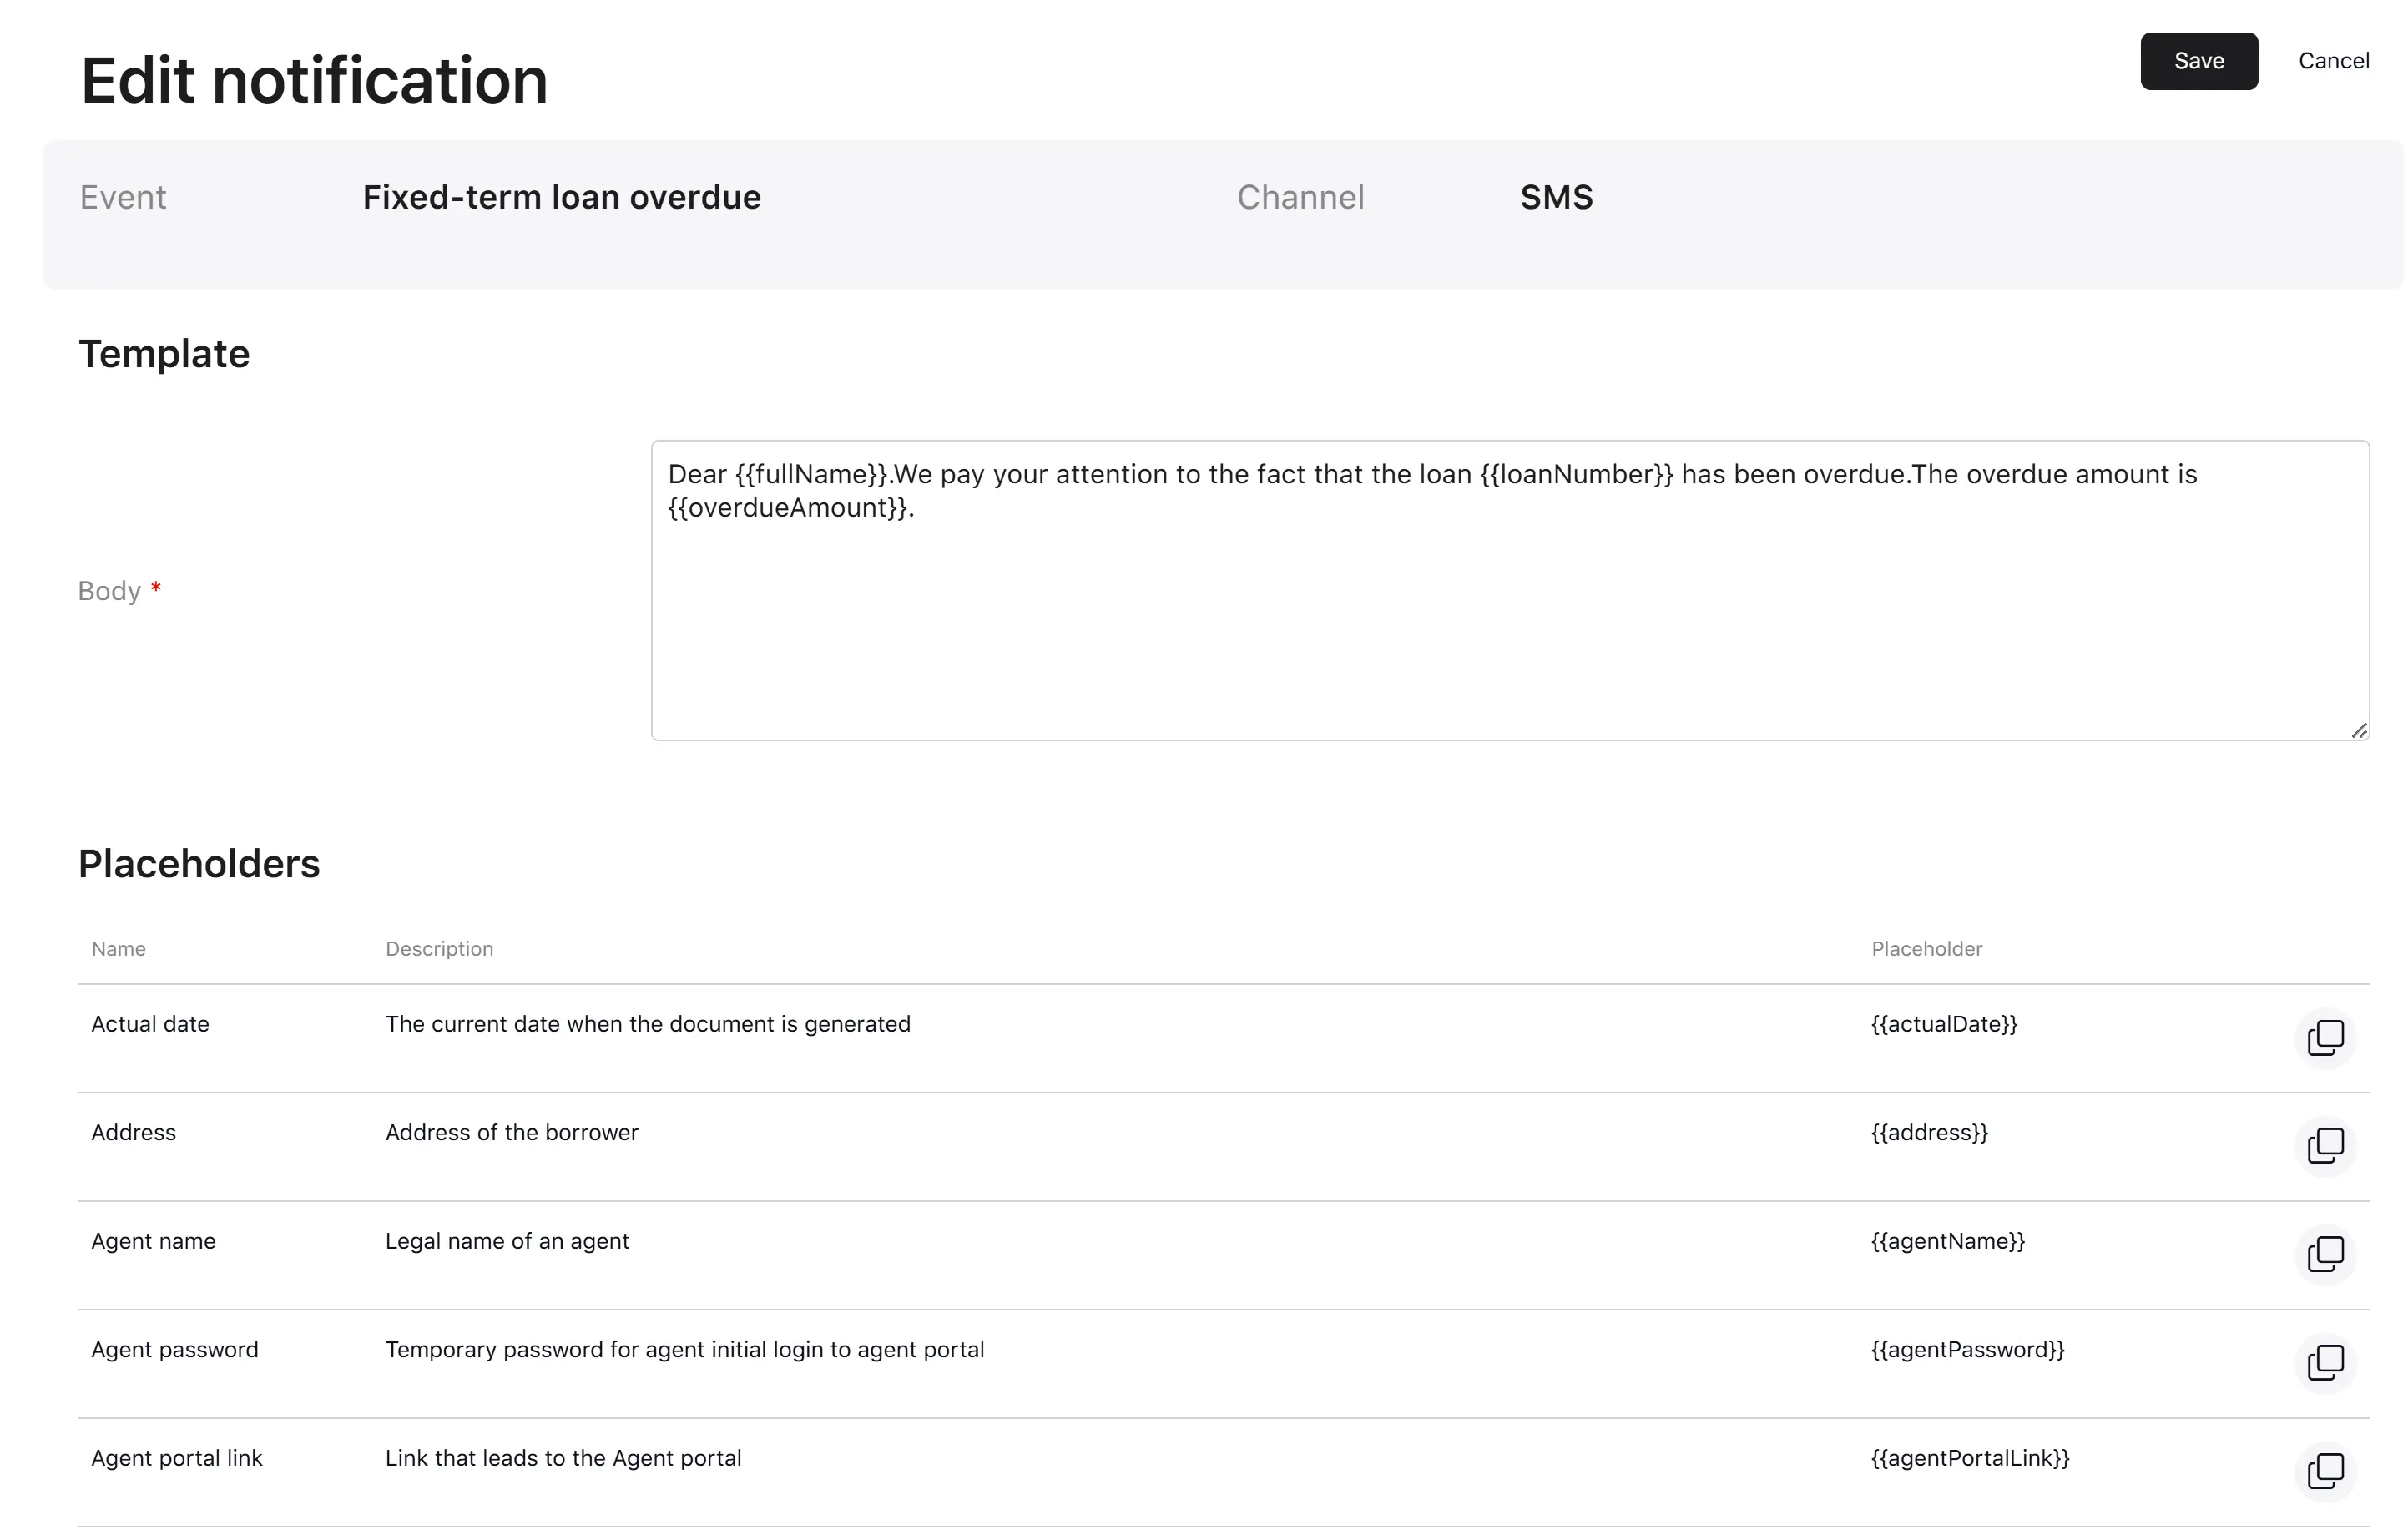
- SMS
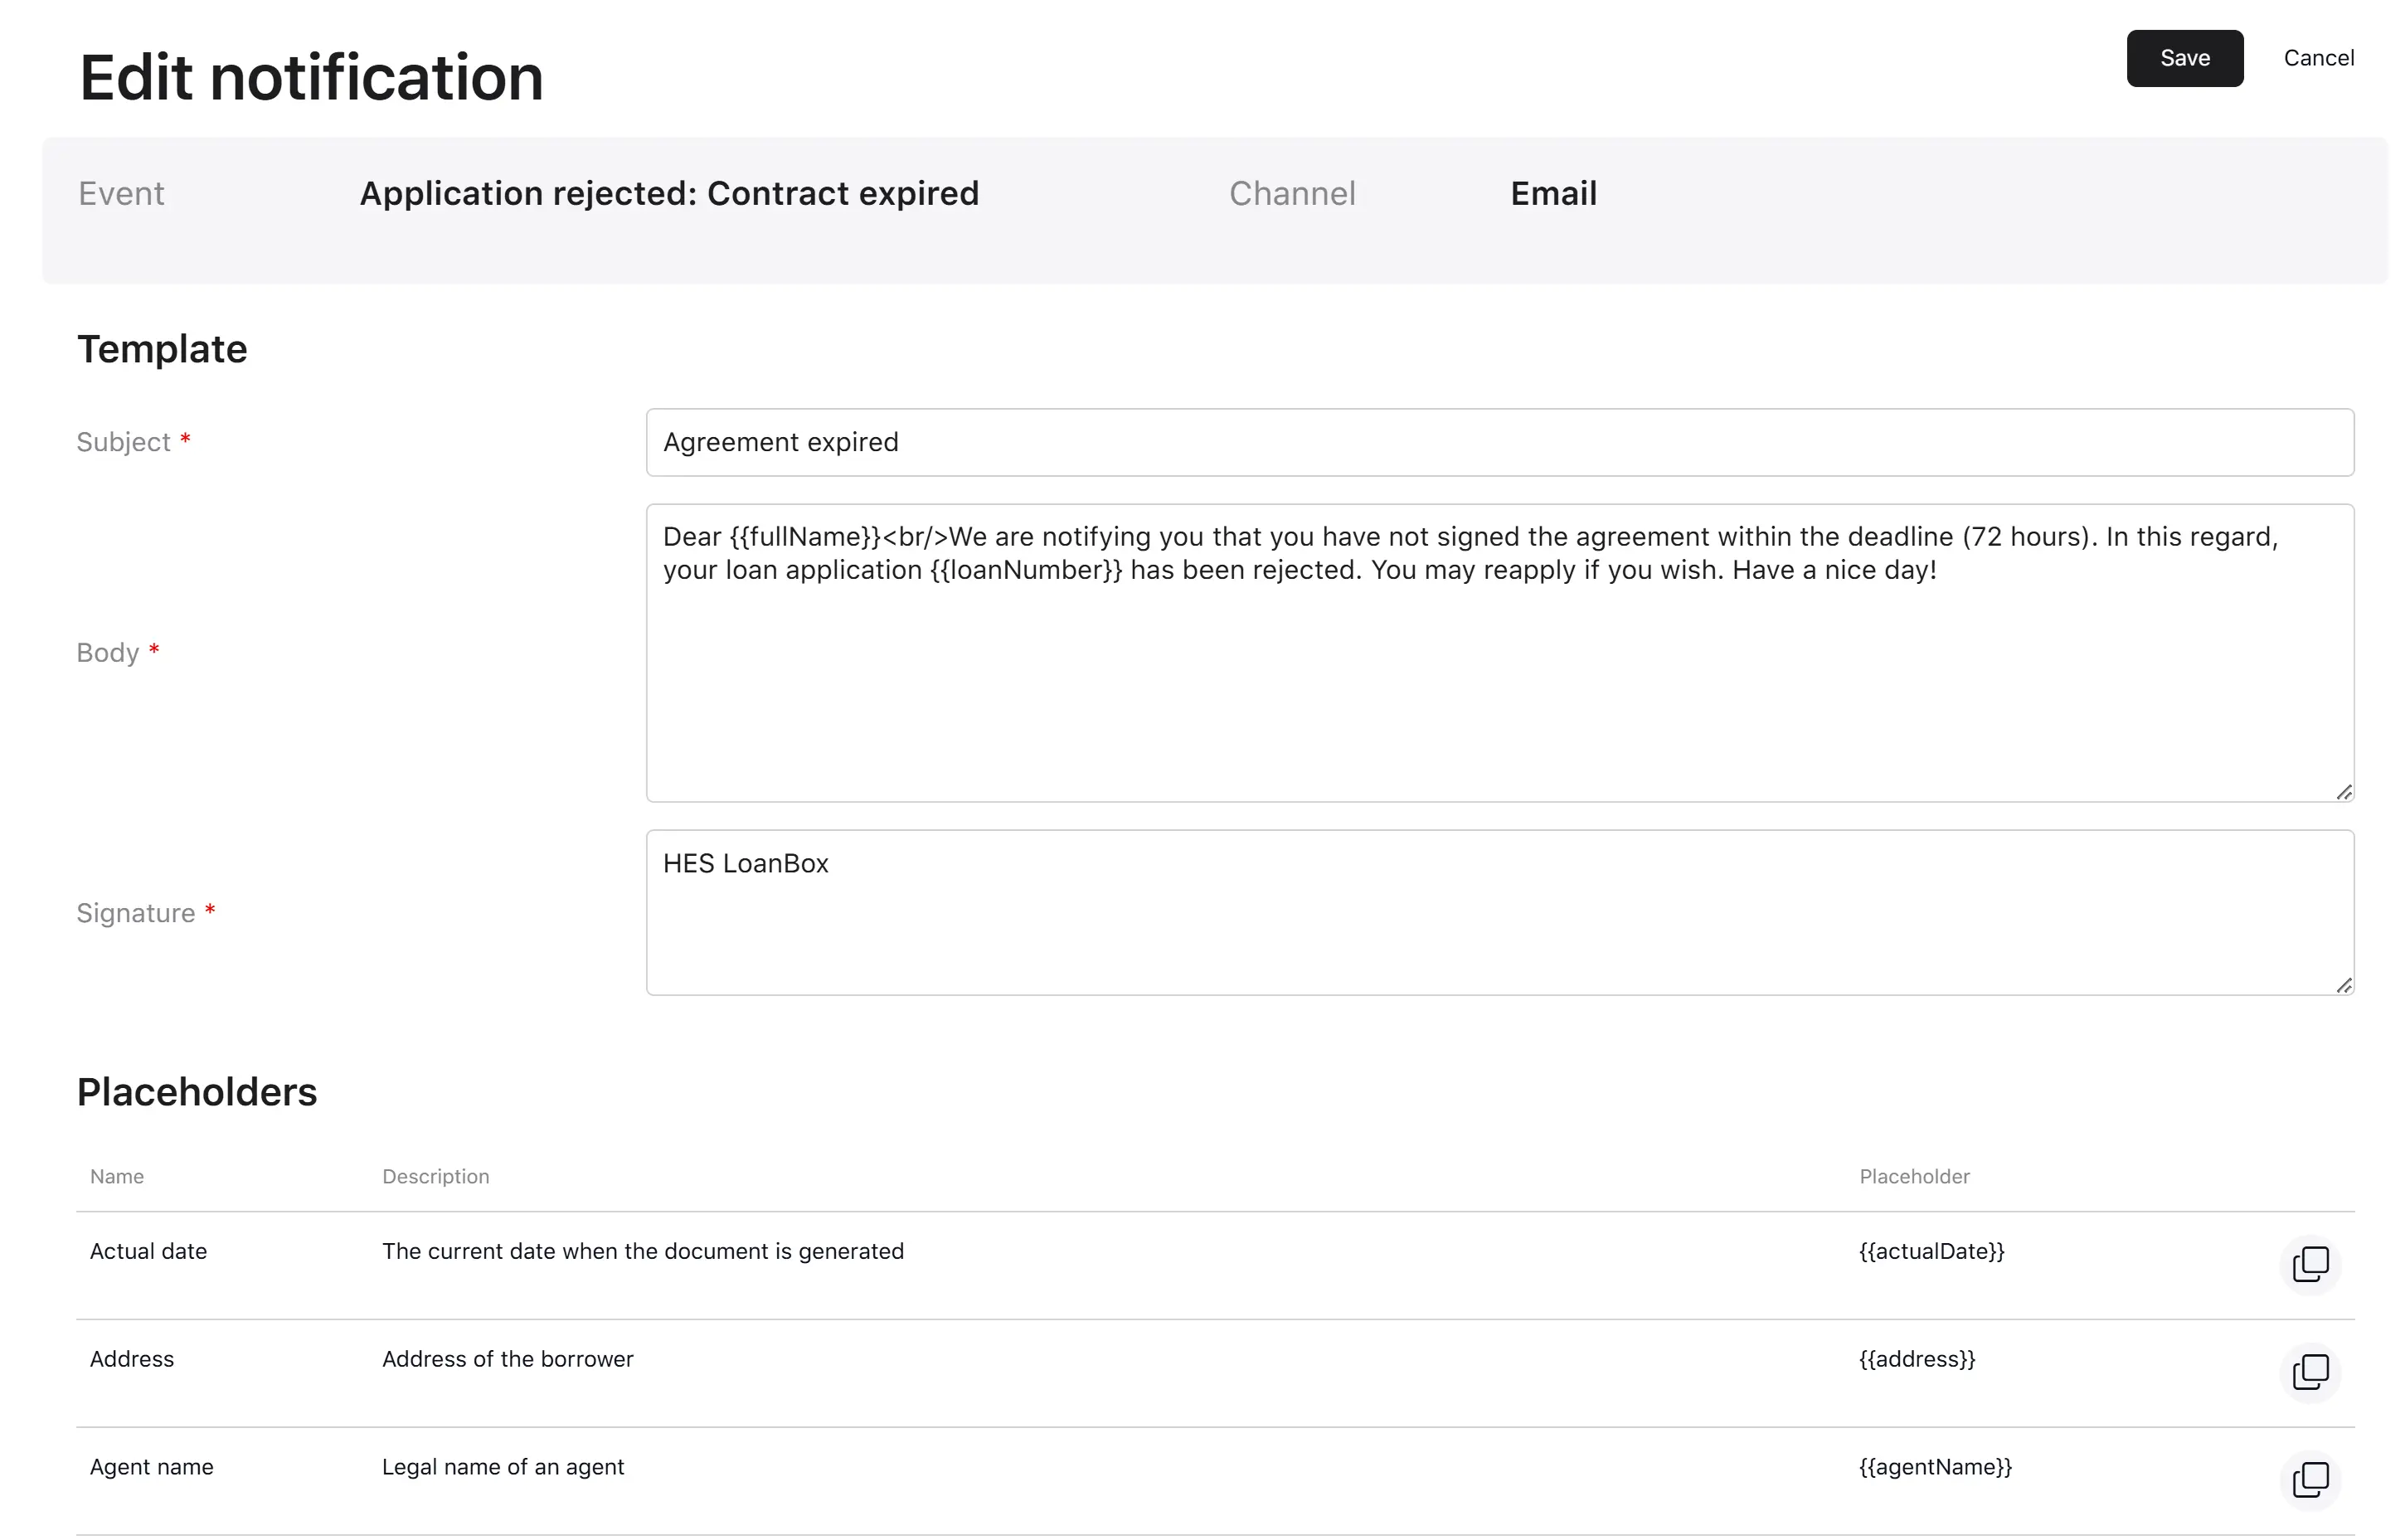
- Subject—message subject (email only).
- Body—message body. Up to 3,000 characters.
- Signature—message signature (email only). Up to 255 characters.
Events
The system ships with templates for a wide set of events covering the loan lifecycle and operational notifications, including:
- Application lifecycle: rejected, returned for revision, approved, canceled.
- Loan lifecycle: disbursed, fully repaid, overdue (fixed-term and credit line), payment received, payment date tomorrow, has become inactive, and last payment period reached.
- Adjustments: request approved, declined, returned for revision, applied, revision expired, and signing reached deadline.
- Operational: customer in blacklist, phone number changed, sign contract with OTP, contract signing, agent invitation, lead invitation, custom (notification / SMS / email), drawdown disbursed, credit-line statement created, bank-account-change approved/rejected, and OTP-related notifications.
Setting dependencies
Depends on: the catalog of business events the platform fires. New events become eligible for notification templates when the system version that introduces them is deployed.
Affects:
- Every outgoing borrower or agent communication triggered by the listed events.
- The look, tone, and language of customer-facing messages.
Notification templates list
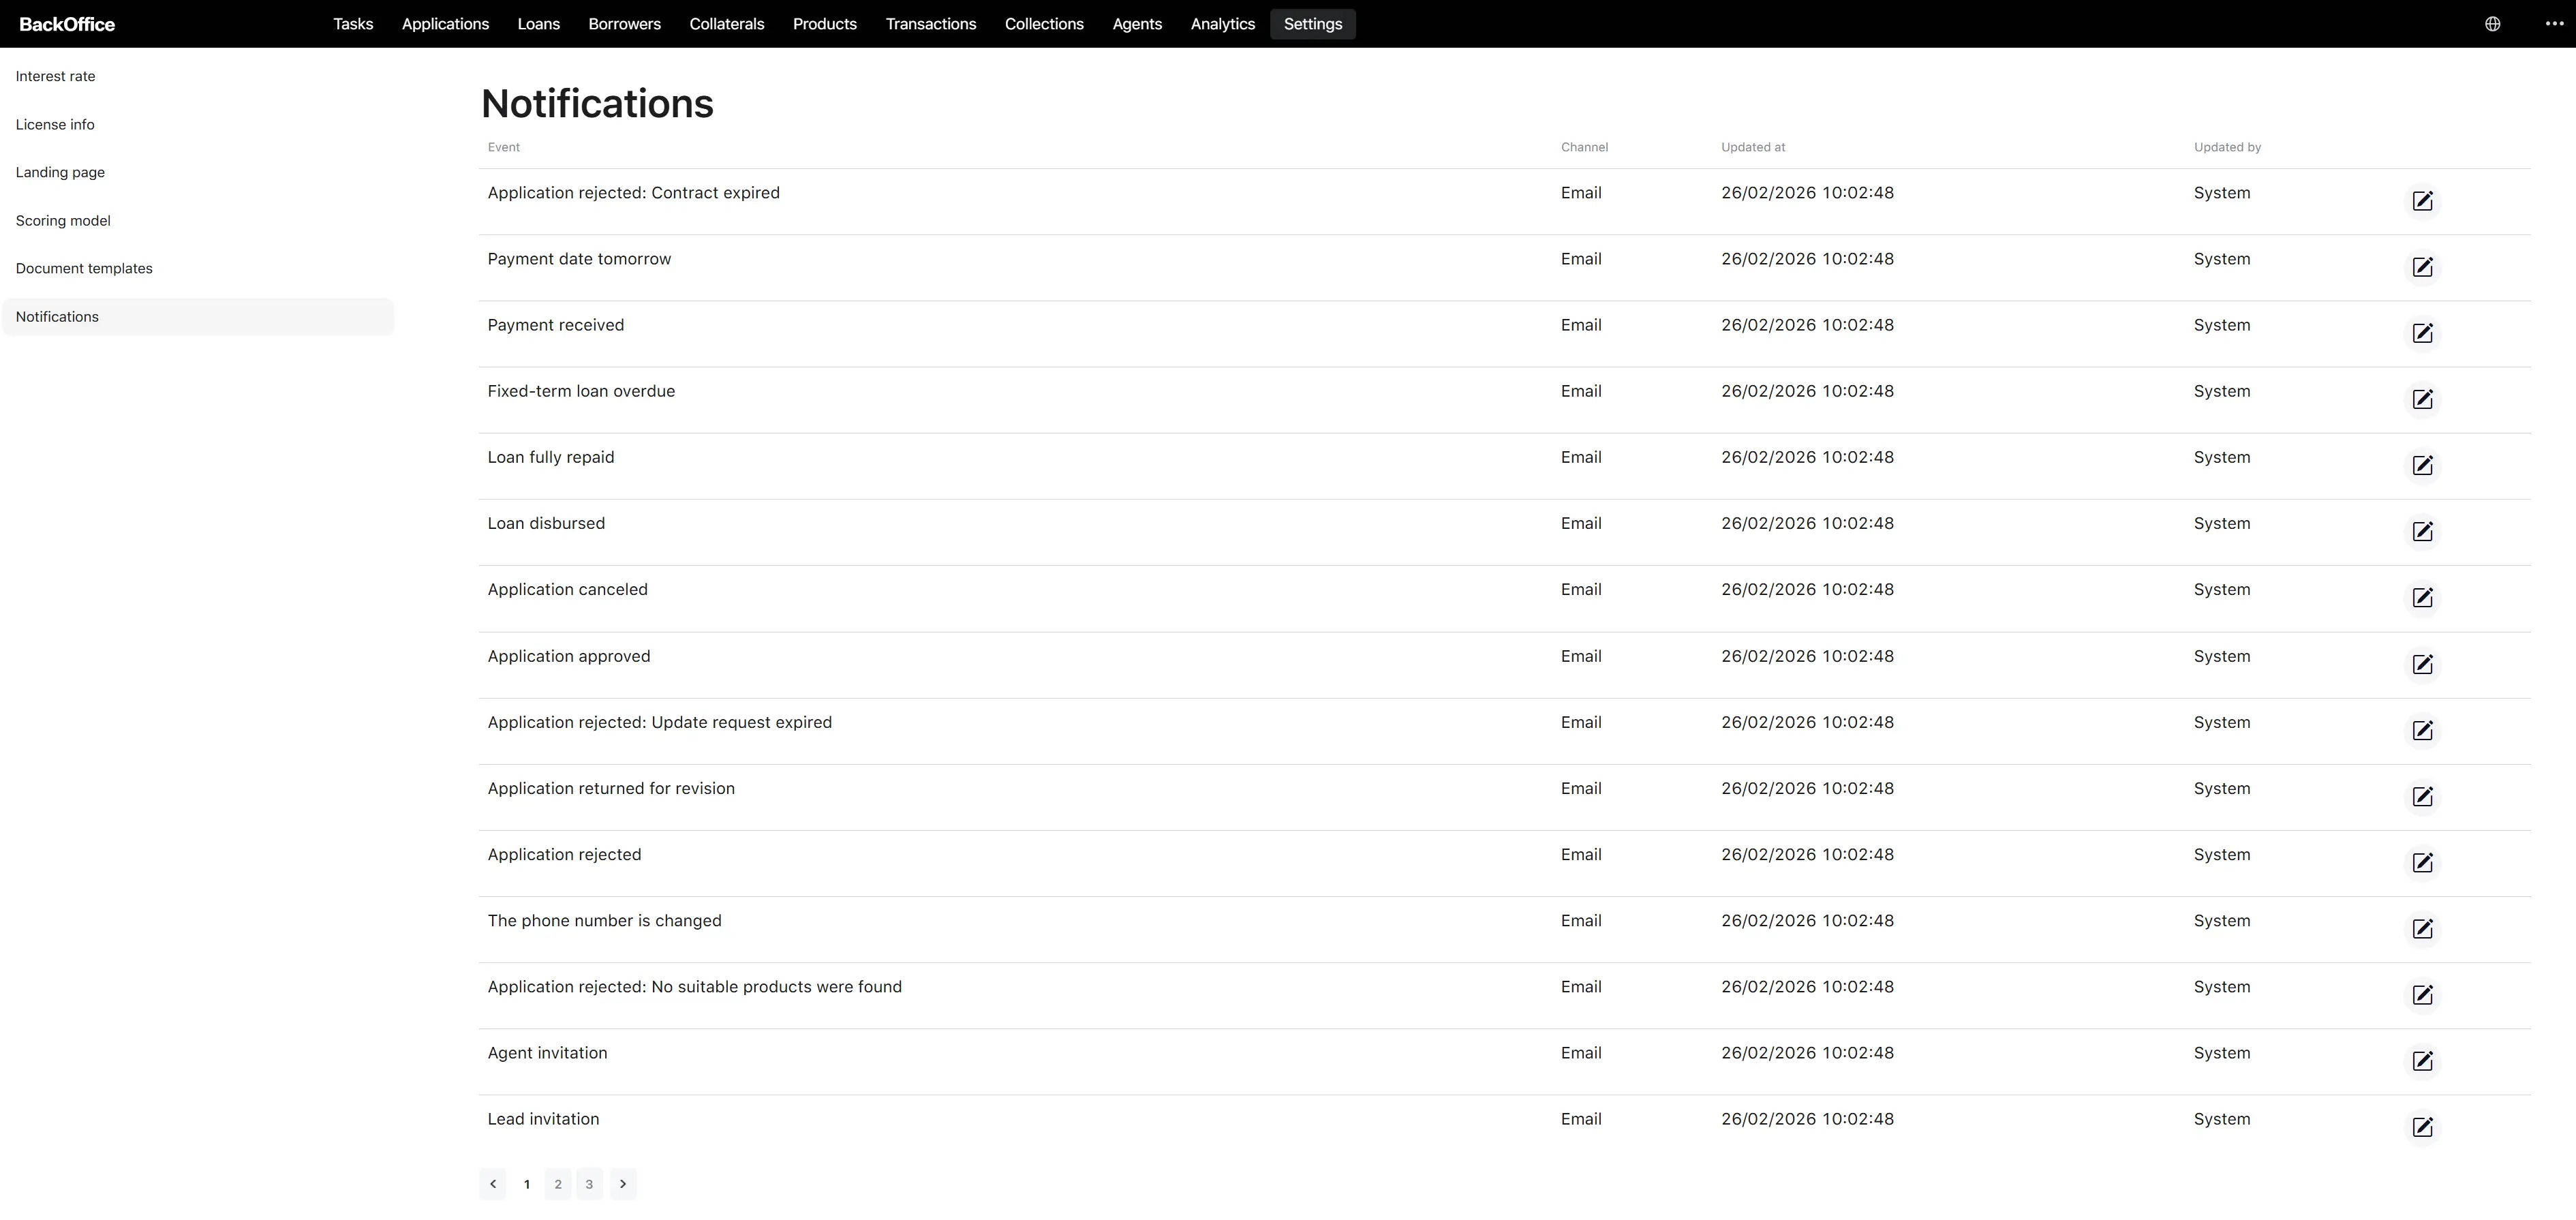
The Notification templates page shows all templates as a paginated list (15 per page).
Columns:
| Column | Content |
|---|---|
| Event | Localized event name (and decline reason, if applicable). |
| Channel | Email or SMS. |
| Updated at | Last update date and time. |
| Updated by | The user who last edited the template. |
| Edit | Pencil icon—opens the editor. |
Roles allowed to view: Underwriter, Credit Officer, Collection Manager.
Edit process
Only Credit Officers can edit a notification template.
Step 1. Open the editor
On the list, the user clicks the Edit (pencil) icon on a row. → The system opens “Edit notification” with the template prefilled.
Step 2. Review the locked fields
The header shows Event and Channel as read-only fields—these define which template this is and cannot be changed in the editor.
Step 3. Edit the message
| Field | Required | Visible when | Notes |
|---|---|---|---|
| Subject | Yes | Channel = Email | Up to 200 characters. |
| Body | Yes | Always | Up to 3,000 characters. Multi-line. |
| Signature | Yes | Channel = Email | Up to 255 characters. Multi-line. |
The form supports placeholders—the right-hand panel lists the placeholders supported for notification templates so the user can copy them into the body, subject, or signature.
Step 4. Save
The user clicks Save. → The system updates the template, records the change in the audit history (with the editor’s name and timestamp), and returns to the list. The new content is used the next time the corresponding event fires.
Clicking Cancel discards the edits and returns to the list.