Borrower operations: detailed flows
This section documents the four most frequently used borrower operations in detail: form fields, validation rules, and the end-to-end process flow.
Initiate Payment
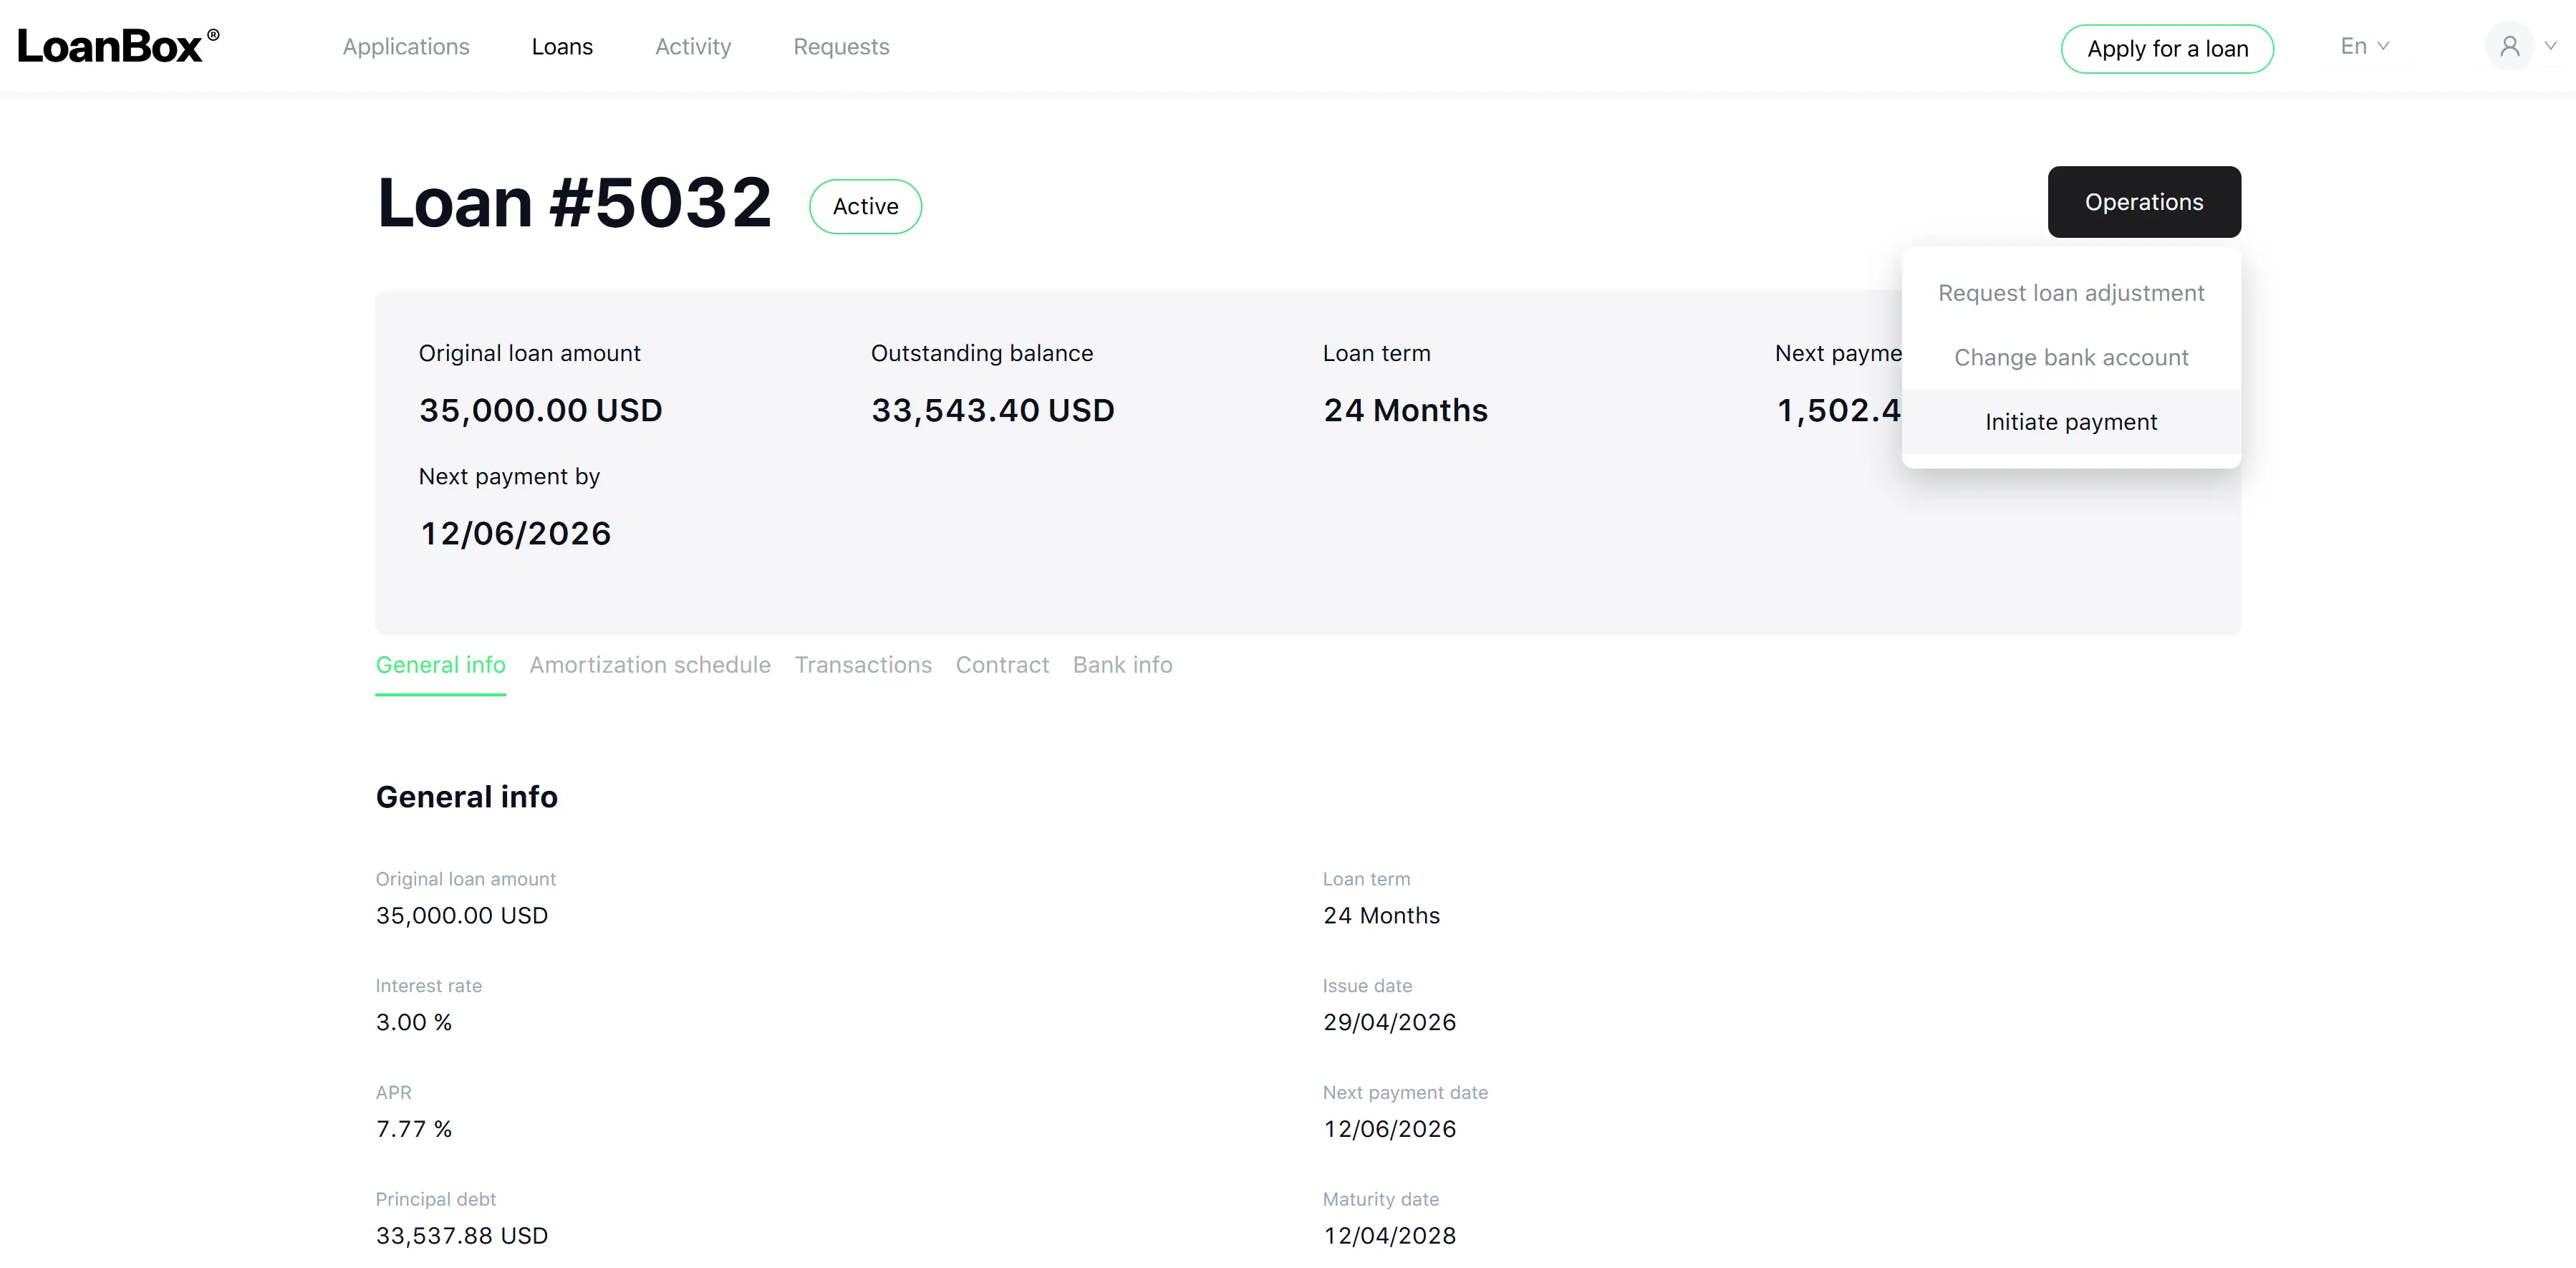
Initiate Payment lets a borrower submit a repayment toward an active loan — both fixed-term loans and credit lines. The borrower starts it from the loan detail view.
Form fields
| Field | Description | Type | Required | Possible values | Default | Notes |
|---|---|---|---|---|---|---|
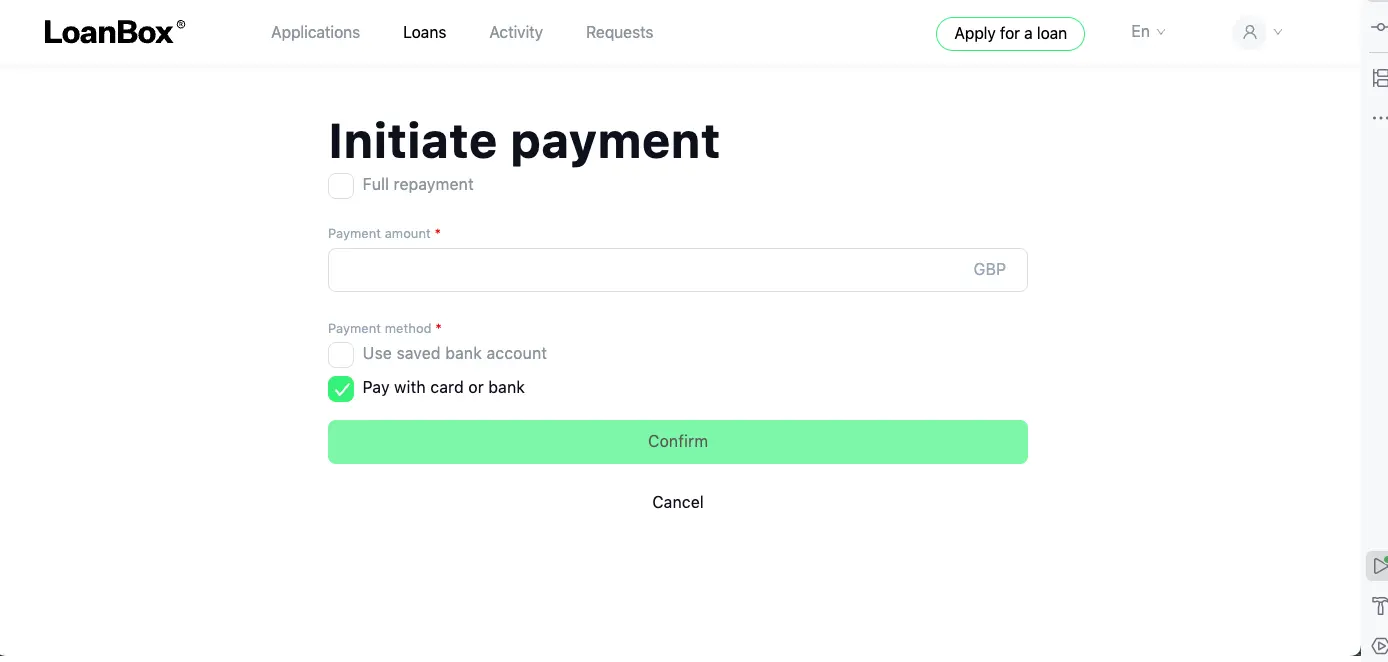
| Full repayment | Tick this to repay the full outstanding balance at once instead of paying a partial amount | Checkbox | No | On / Off | Off | When ticked, Payment amount is hidden and Payoff amount as of today is shown instead |
| Payment amount | The amount the borrower wants to pay | Number (currency) | Yes (when Full repayment is off) | Greater than 0; up to 100,000,000; up to 2 decimal places | Empty | Hidden when Full repayment is on |
| Payoff amount as of today | The system-calculated total needed to close the loan as of today (principal + interest + fees) | Number (currency, read-only) | — | — | Calculated by the system | Shown only when Full repayment is on |
| Payment method | How the funds are taken | Radio | Yes | Use saved bank account; Pay with card or bank | Use saved bank account | When “Use saved bank account” is selected, a confirmation message shows which masked account will be debited |
Buttons
- Confirm — submit the payment.
- Cancel — discard and return to the loan card.
End-to-end process flow
Step 1. Open the payment form.
The borrower clicks Initiate payment on the loan card. The system shows the payment form pre-populated with the loan reference.
Step 2. Choose the amount.
The borrower either enters a custom Payment amount or ticks Full repayment. In the latter case, the system automatically fills the payoff amount and locks the field.
Step 3. Choose the payment method.
The borrower selects Use saved bank account (an automated withdrawal from the bank account linked to the loan) or Pay with card or bank (an interactive payment session). The form shows a description matching the choice.
Step 4. Confirm.
The borrower clicks Confirm. The system validates that the loan is still active and that no other payment is already being processed for the same loan.
- If another payment is in flight, the borrower sees an error, and the operation is rejected.
- If the loan is no longer active, the operation is rejected.
Step 5. The system processes the payment.
The system creates a payment transaction and routes it to the configured payment provider. For “Use saved bank account,” the borrower then sees a “Payment initiated” confirmation screen and the transaction proceeds in the background. For “Pay with card or bank,” the borrower is taken through the provider’s interactive payment flow.
Step 6. Result.
When the provider confirms the payment, the system records the transaction against the loan, updates the outstanding balance, and sends the borrower an email confirmation. The transaction appears in the loan’s Transaction history with status Active until settled, then Completed.
Note

Get Drawdown
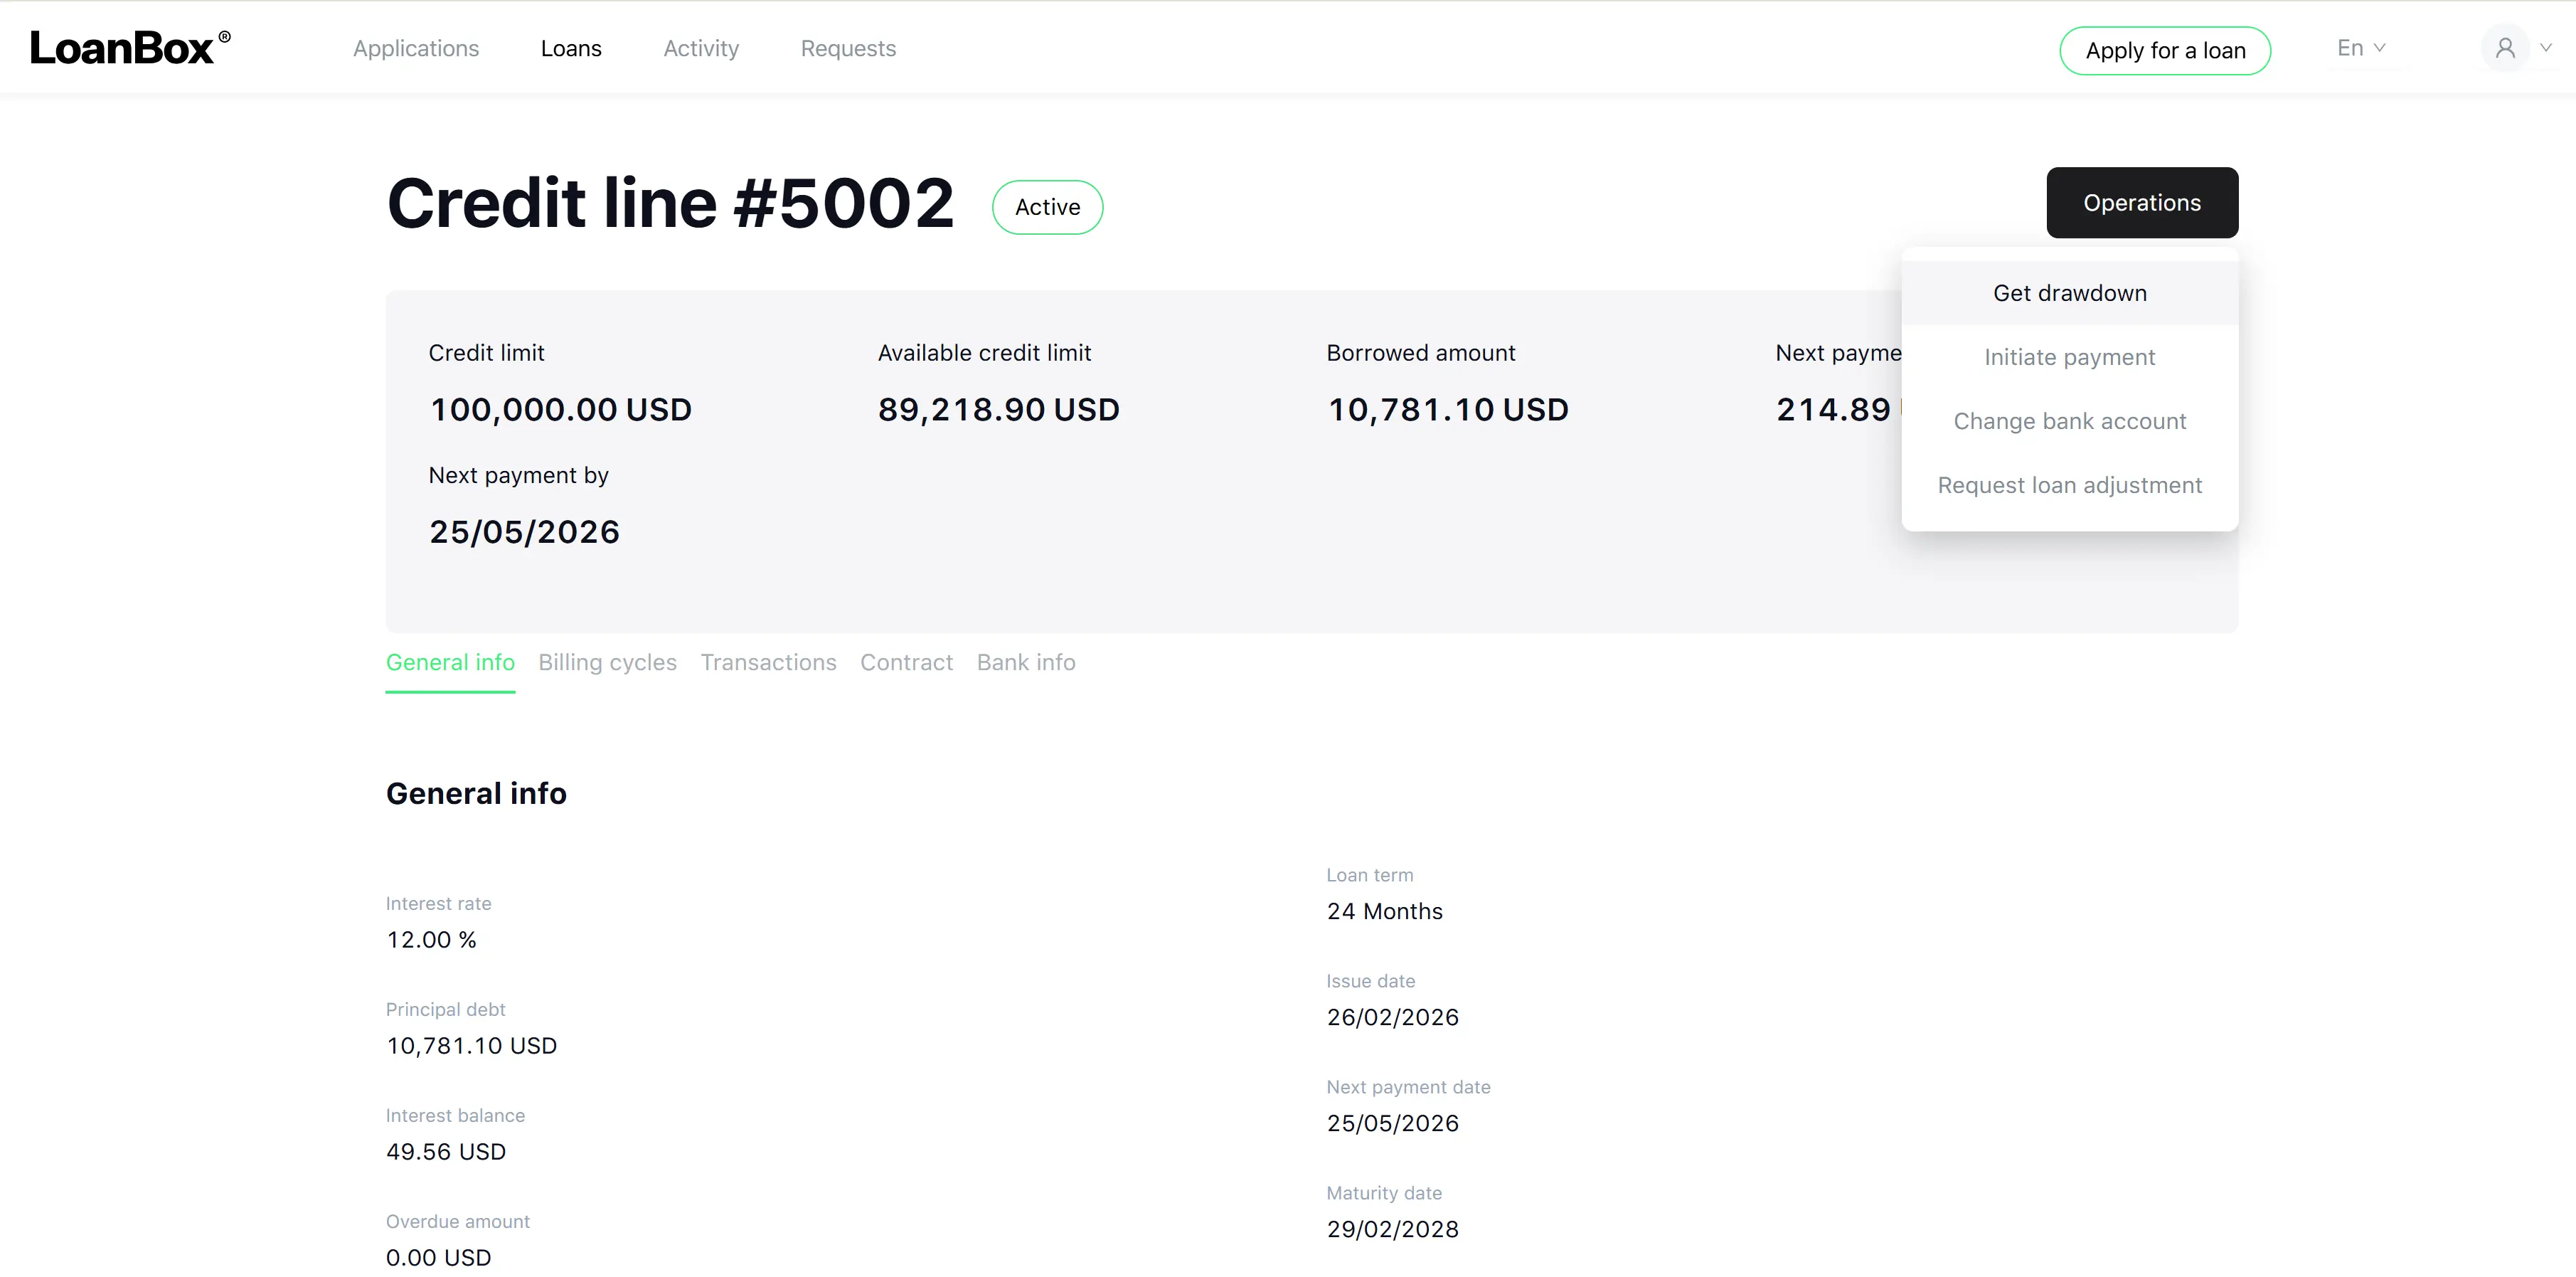
Get Drawdown lets a borrower request a disbursement from an active credit line. It is available only on credit-line loans where the drawdown freeze date has not been reached and a credit balance remains. The operation is launched from the credit-line detail view.
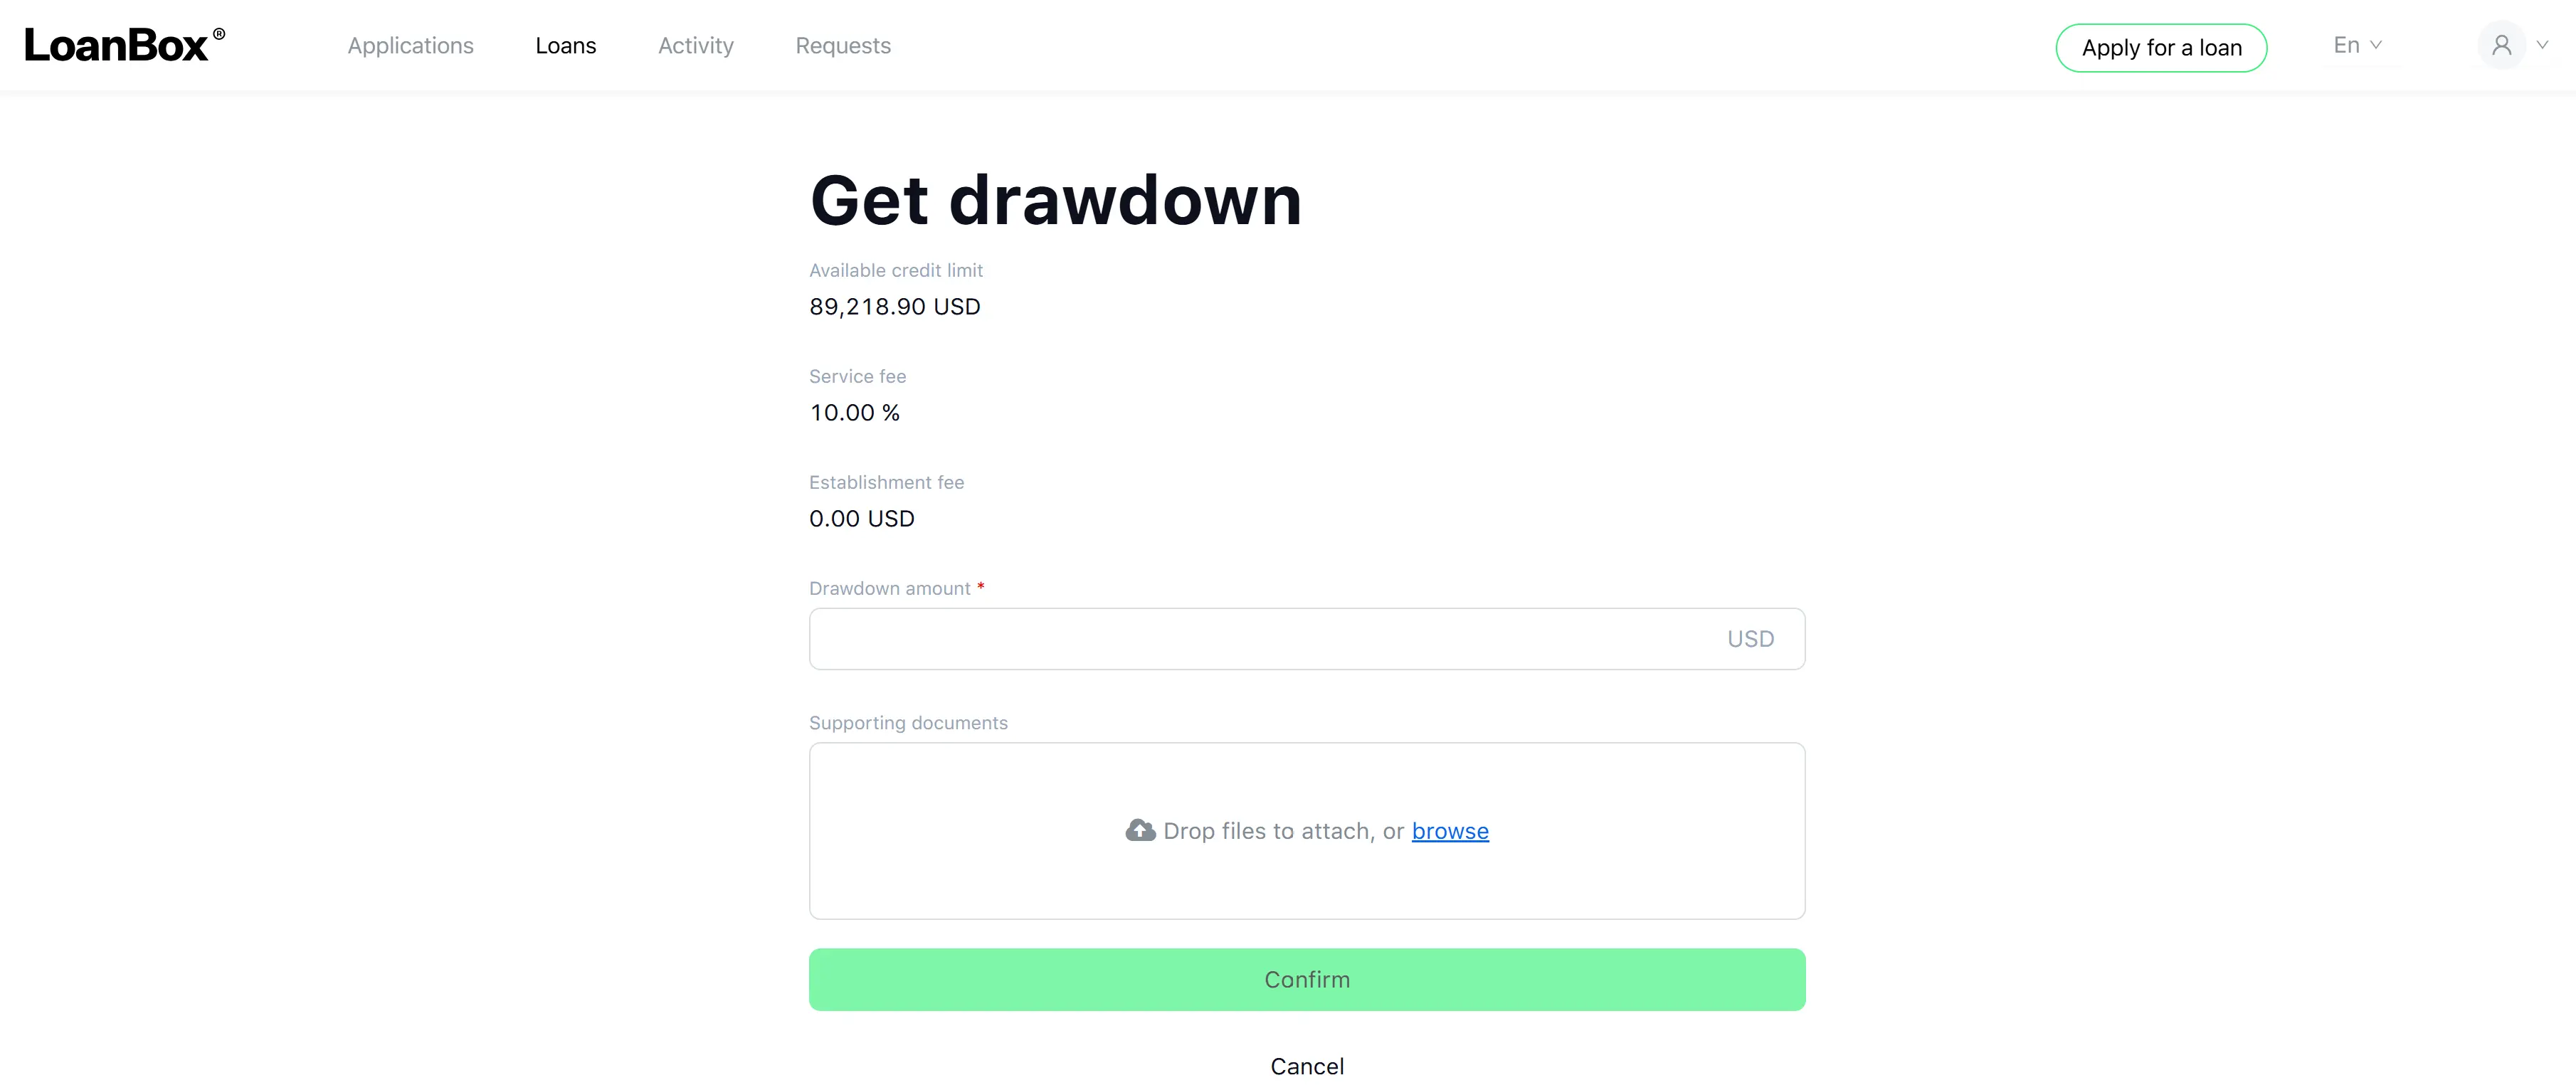
Form fields
| Field | Description | Type | Required | Possible values | Default | Notes |
|---|---|---|---|---|---|---|
| Available credit limit | The remaining amount the borrower can still draw | Number (currency, read-only) | — | — | Calculated by the system | Shown for reference |
| Service fee | The service fee rate that applies to this drawdown | Percentage (read-only) | — | — | From loan product | Shown for reference |
| Establishment fee | The fixed establishment fee that will be deducted from the drawdown | Number (currency, read-only) | — | — | From loan product | Shown for reference |
| Drawdown amount | The amount the borrower wants to draw | Number (currency) | Yes | Greater than 0; up to 2 decimal places; cannot exceed the available credit limit minus establishment fee and service fee | Empty | Validation error appears if the entered amount exceeds the allowed maximum |
| Supporting documents | Optional documents proving the purpose of the drawdown | File upload | No | Image and document files up to 20 MB each | Empty | Multiple files allowed |
Buttons
- Confirm — submit the drawdown request.
- Cancel — discard and return to the loan card.
End-to-end process flow
Step 1. Open the drawdown form.
The borrower clicks Get drawdown on the credit-line card. The system shows the form with the available credit limit, applicable service fee, and establishment fee already filled in.
Step 2. Enter the amount and attach documents.
The borrower enters the Drawdown amount and optionally uploads supporting documents. The form validates that the amount stays within the available limit.
Step 3. Confirm.
The borrower clicks Confirm.
The system validates:
- the credit line is still active
- the drawdown freeze date has not been reached
- the requested amount does not exceed the available credit limit
- no other drawdown is currently in progress on the same credit line.
If any check fails, the system displays the relevant error and stops the operation.
Step 4. System initiates disbursement.
The system selects the disbursement channel based on the loan product (either automatically via the configured payment provider or manually upon lender confirmation). For automatic disbursements, the funds are queued for transfer to the borrower’s linked bank account; for manual disbursements, a back-office task is created for the lender to confirm.
Step 5. Confirmation screen.
Once the disbursement is initiated, the borrower sees a “Drawdown initiated” screen confirming the amount, the linked credit line, and that the funds will arrive within 1–3 business days.
Step 6. Result.
When the disbursement provider confirms the transfer, a Disbursement transaction is recorded on the credit line, the borrowed amount and available credit limit are updated, and the borrower receives an email confirmation.
Note
Change Bank Account
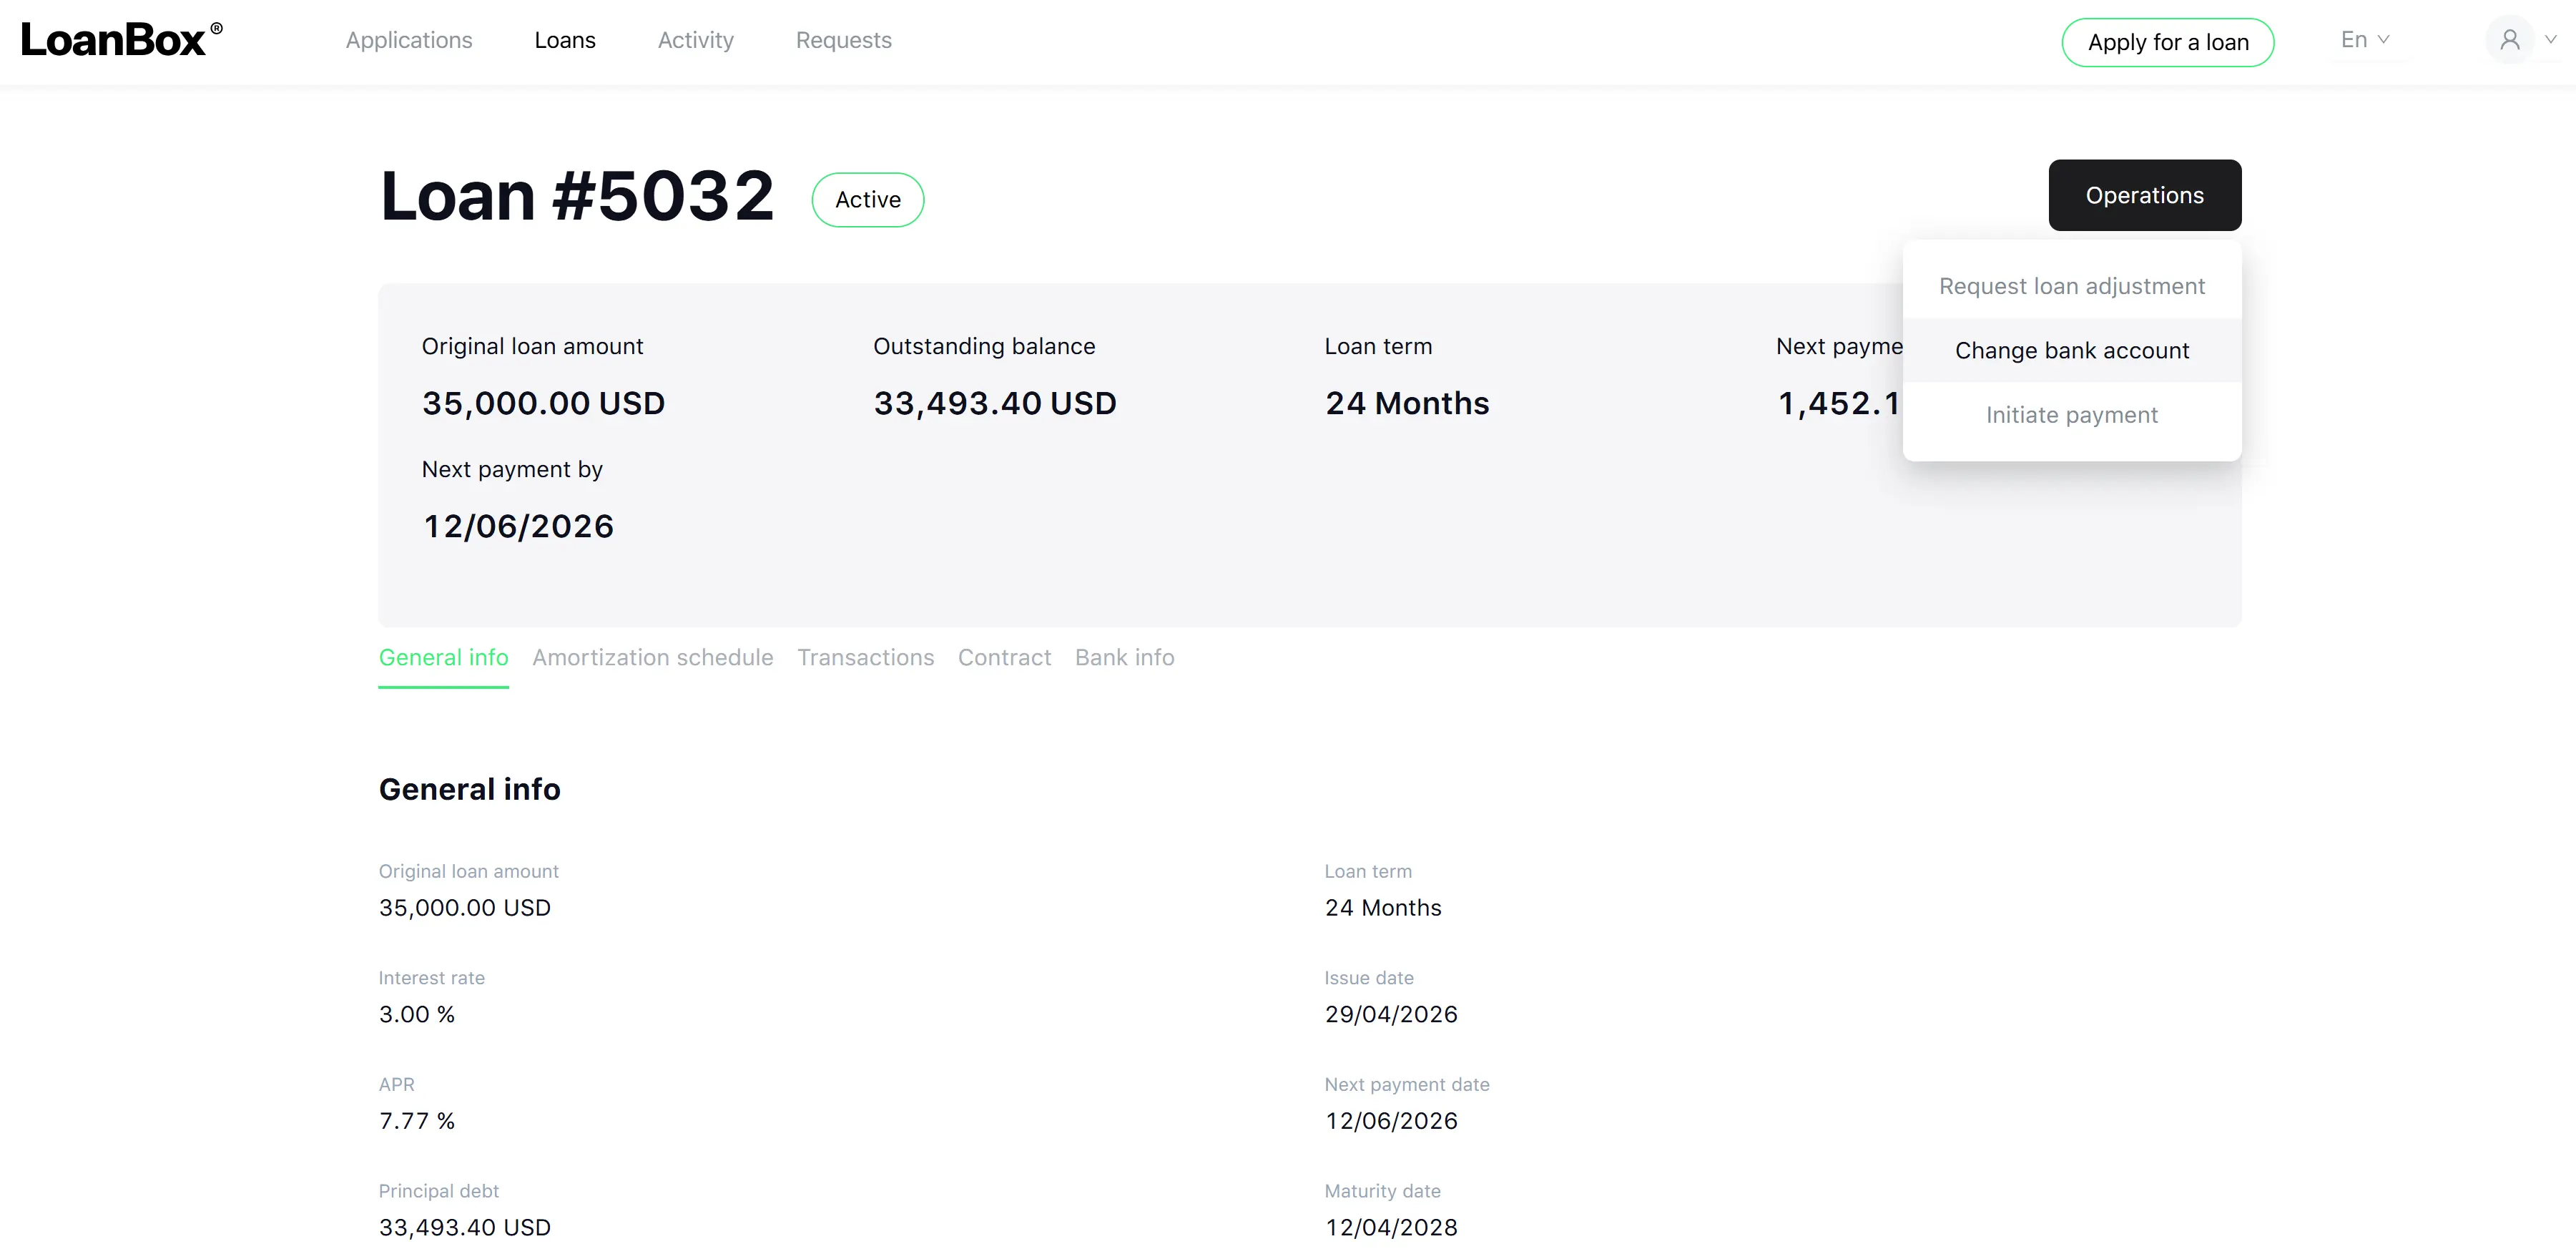
Change Bank Account lets a borrower replace the bank account linked to a loan — that is, the account from which scheduled repayments will be debited. The operation is launched from the loan detail view.
Form fields
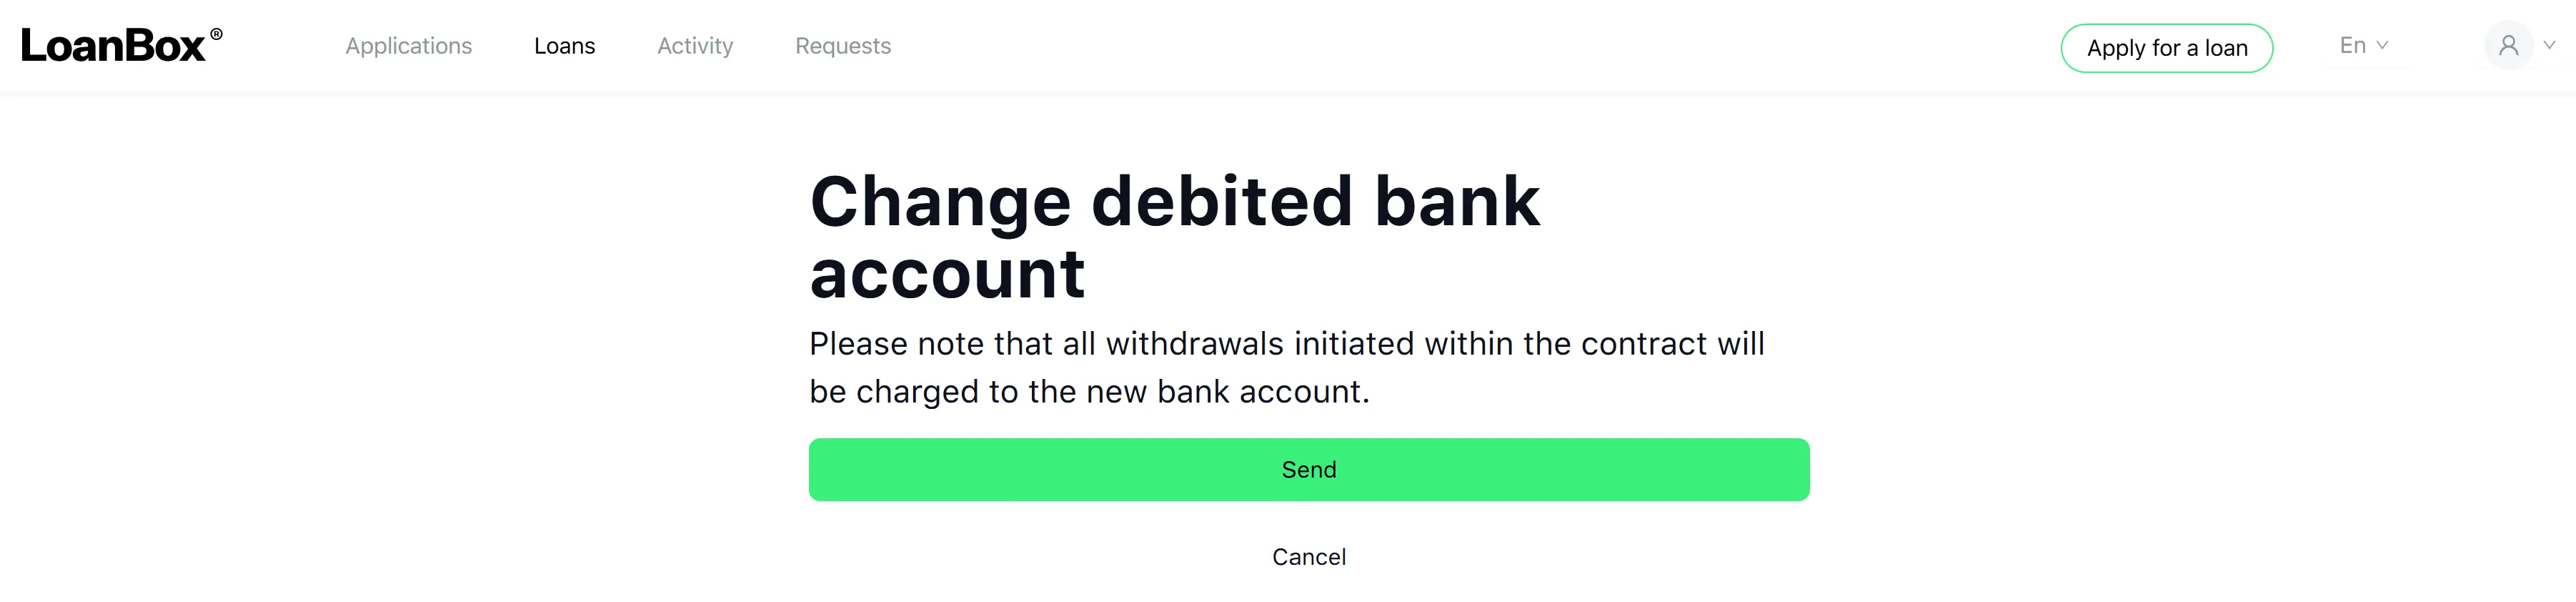
The change request itself is a simple confirmation form. The new account details are not entered manually — they are captured automatically by the open-banking provider during step 3 of the flow.
| Field | Description | Type | Notes |
|---|---|---|---|
| Confirmation message | Explanation that all future withdrawals will be charged to the new bank account | Static message | Read-only |
| Loan reference | The loan the change applies to | Hidden | Filled automatically from the loan the borrower started from |
Buttons
- Send — confirm intent and start the bank-account change procedure.
- Cancel — discard and return to the loan card.
End-to-end process flow
Step 1. Open the change form.
The borrower clicks Change bank account on the loan card. The system displays the confirmation message “Are you sure you want to change your bank account?” and warns that future repayments will be debited from the new account.
Step 2. Confirm intent.
The borrower clicks Send. The system cancels any previously started (still-unfinished) change procedure for the same loan and starts a new one.
Step 3. Verify the new bank account via open banking.
The system redirects the borrower to the configured open banking provider (Plaid, Flinks, Illion, or Acquired, depending on the deployment). The borrower logs in to their bank, selects the account they want to use going forward, and authorizes the platform to retrieve the account details.
If the borrower abandons or cancels the provider session, the procedure is canceled, and the existing bank account remains unchanged.
Step 4. Wait for the lender’s approval.
The system displays the “Wait for a change of bank account” task in Activities while a credit officer reviews the new account details. The borrower can return to the portal at any time; the task auto-updates every 10 seconds. If the lender does not respond within 24 hours, the procedure is automatically canceled.
Step 5a. Lender approves.
The new bank account replaces the previous one on both the loan and the borrower profile. The borrower receives a “Bank account change approved” notification. The loan card now shows the new account.
Step 5b. Lender declines.
The previous bank account remains in place. The borrower sees the message “Sorry, your request to update your bank account has been rejected” and receives a corresponding notification. The borrower can start a new change request afterward.
Request Loan Adjustment
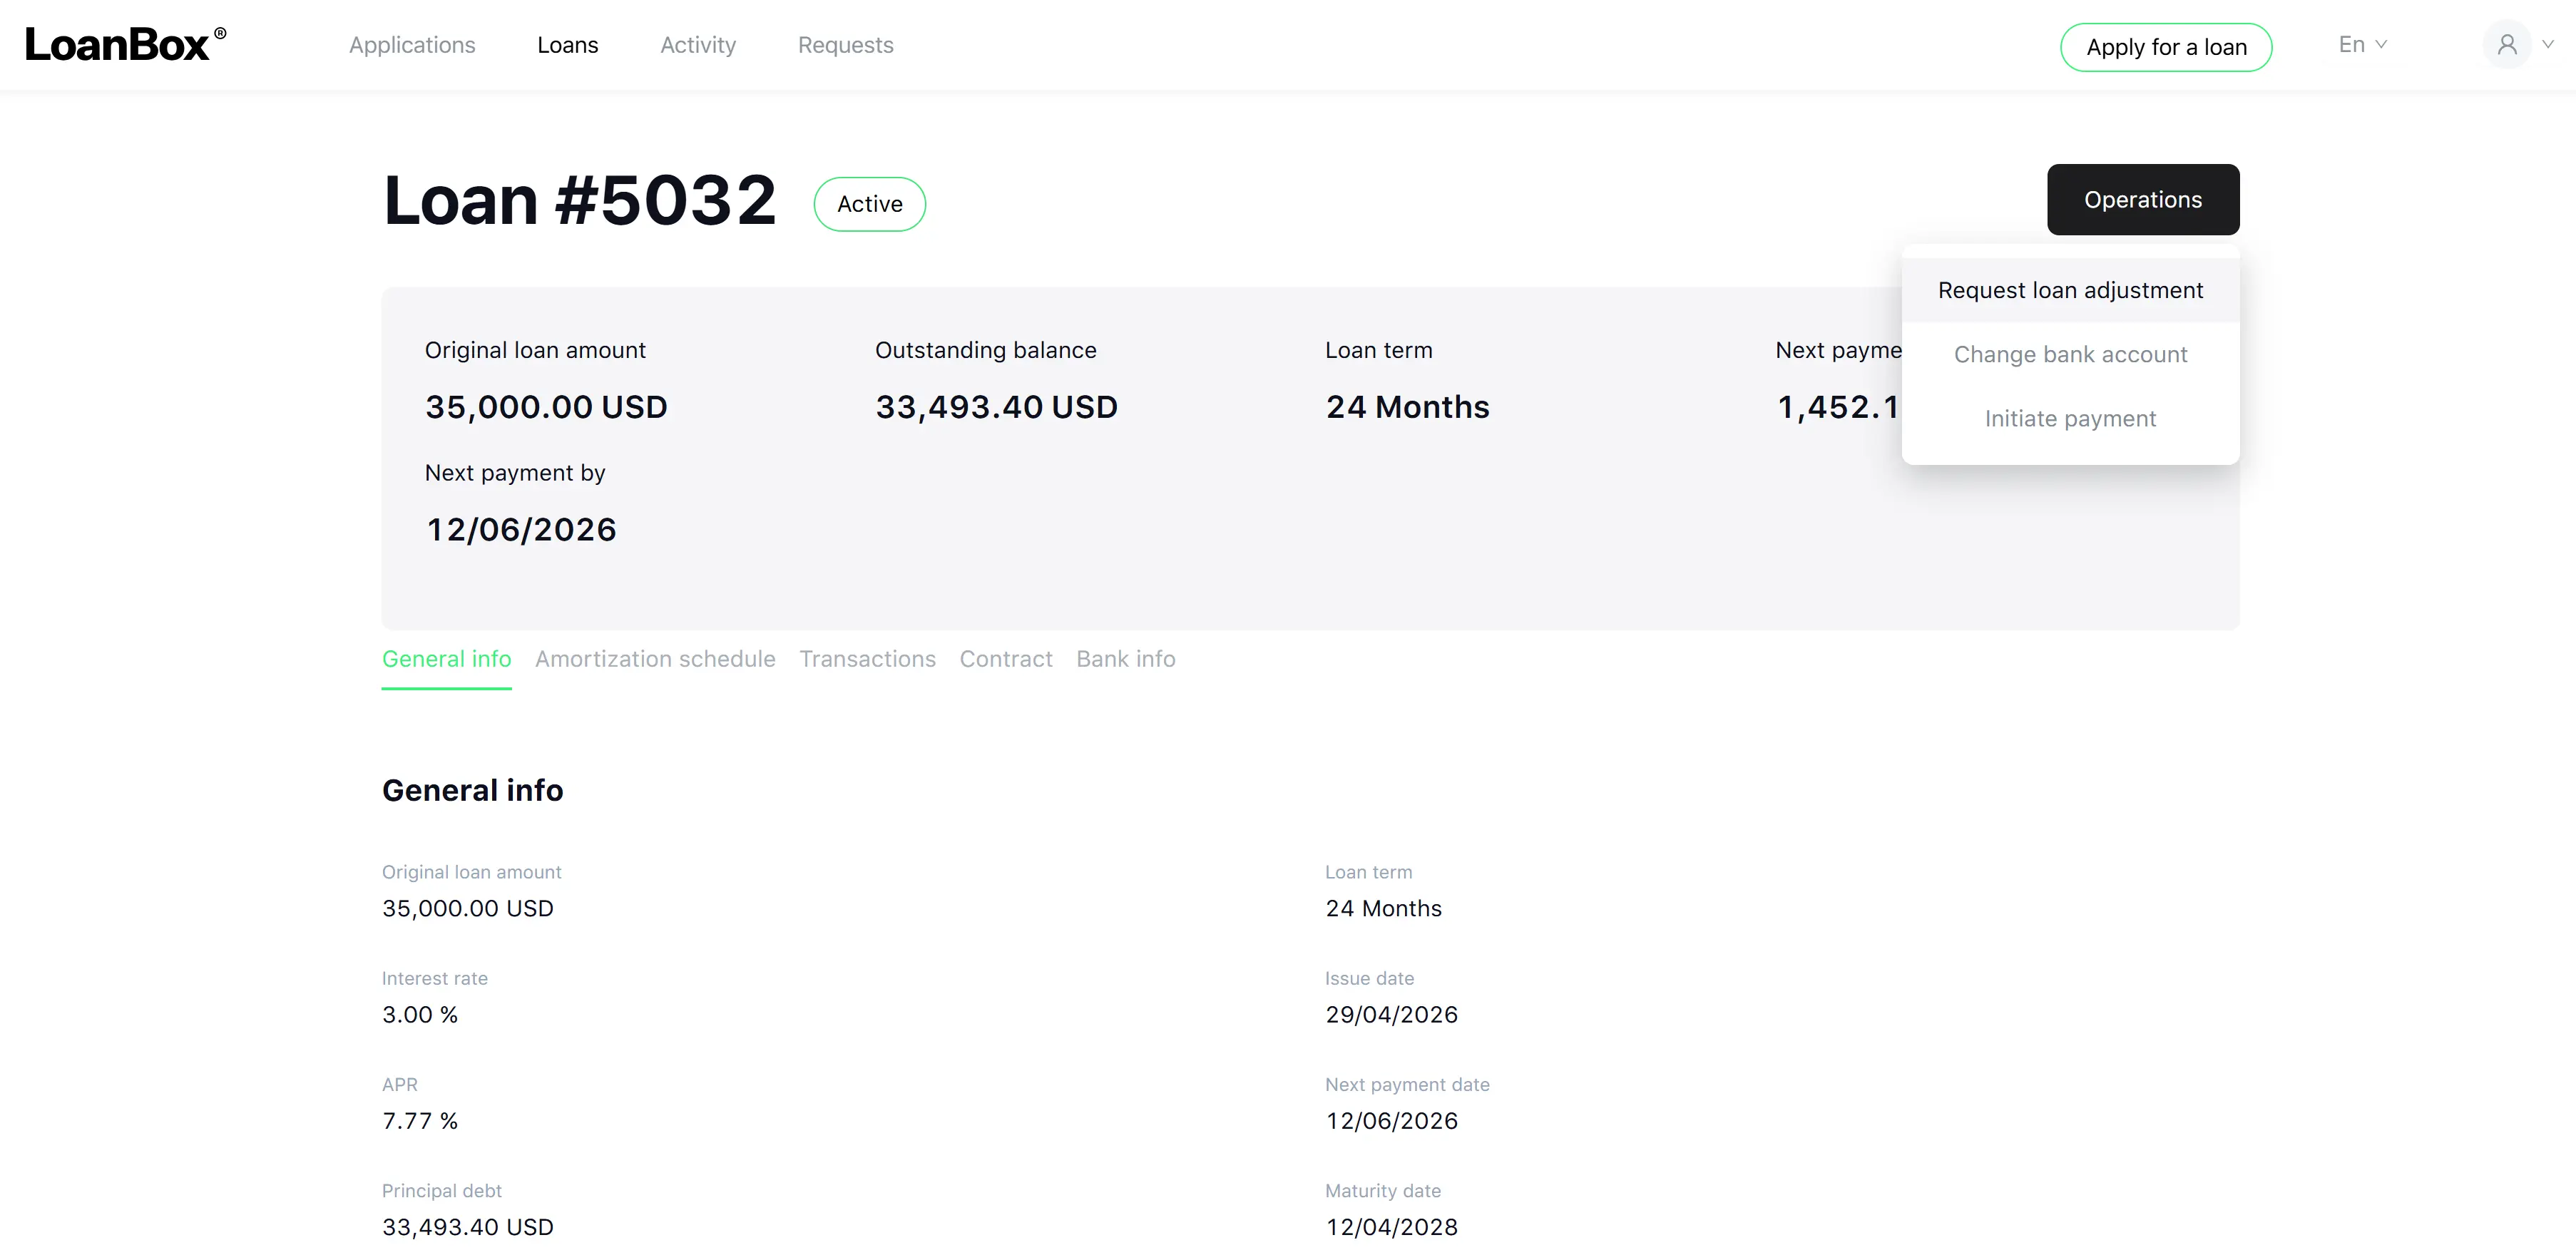
Request Loan Adjustment lets a borrower ask the lender to modify the terms of an active loan. The lender ultimately selects which of the three restructuring options is applied (Extend maturity date, Amend interest rate, or Apply payment holiday) and runs the calculations; the borrower’s role is to submit a written request with optional attachments. The operation is launched from the loan detail view.
Form fields
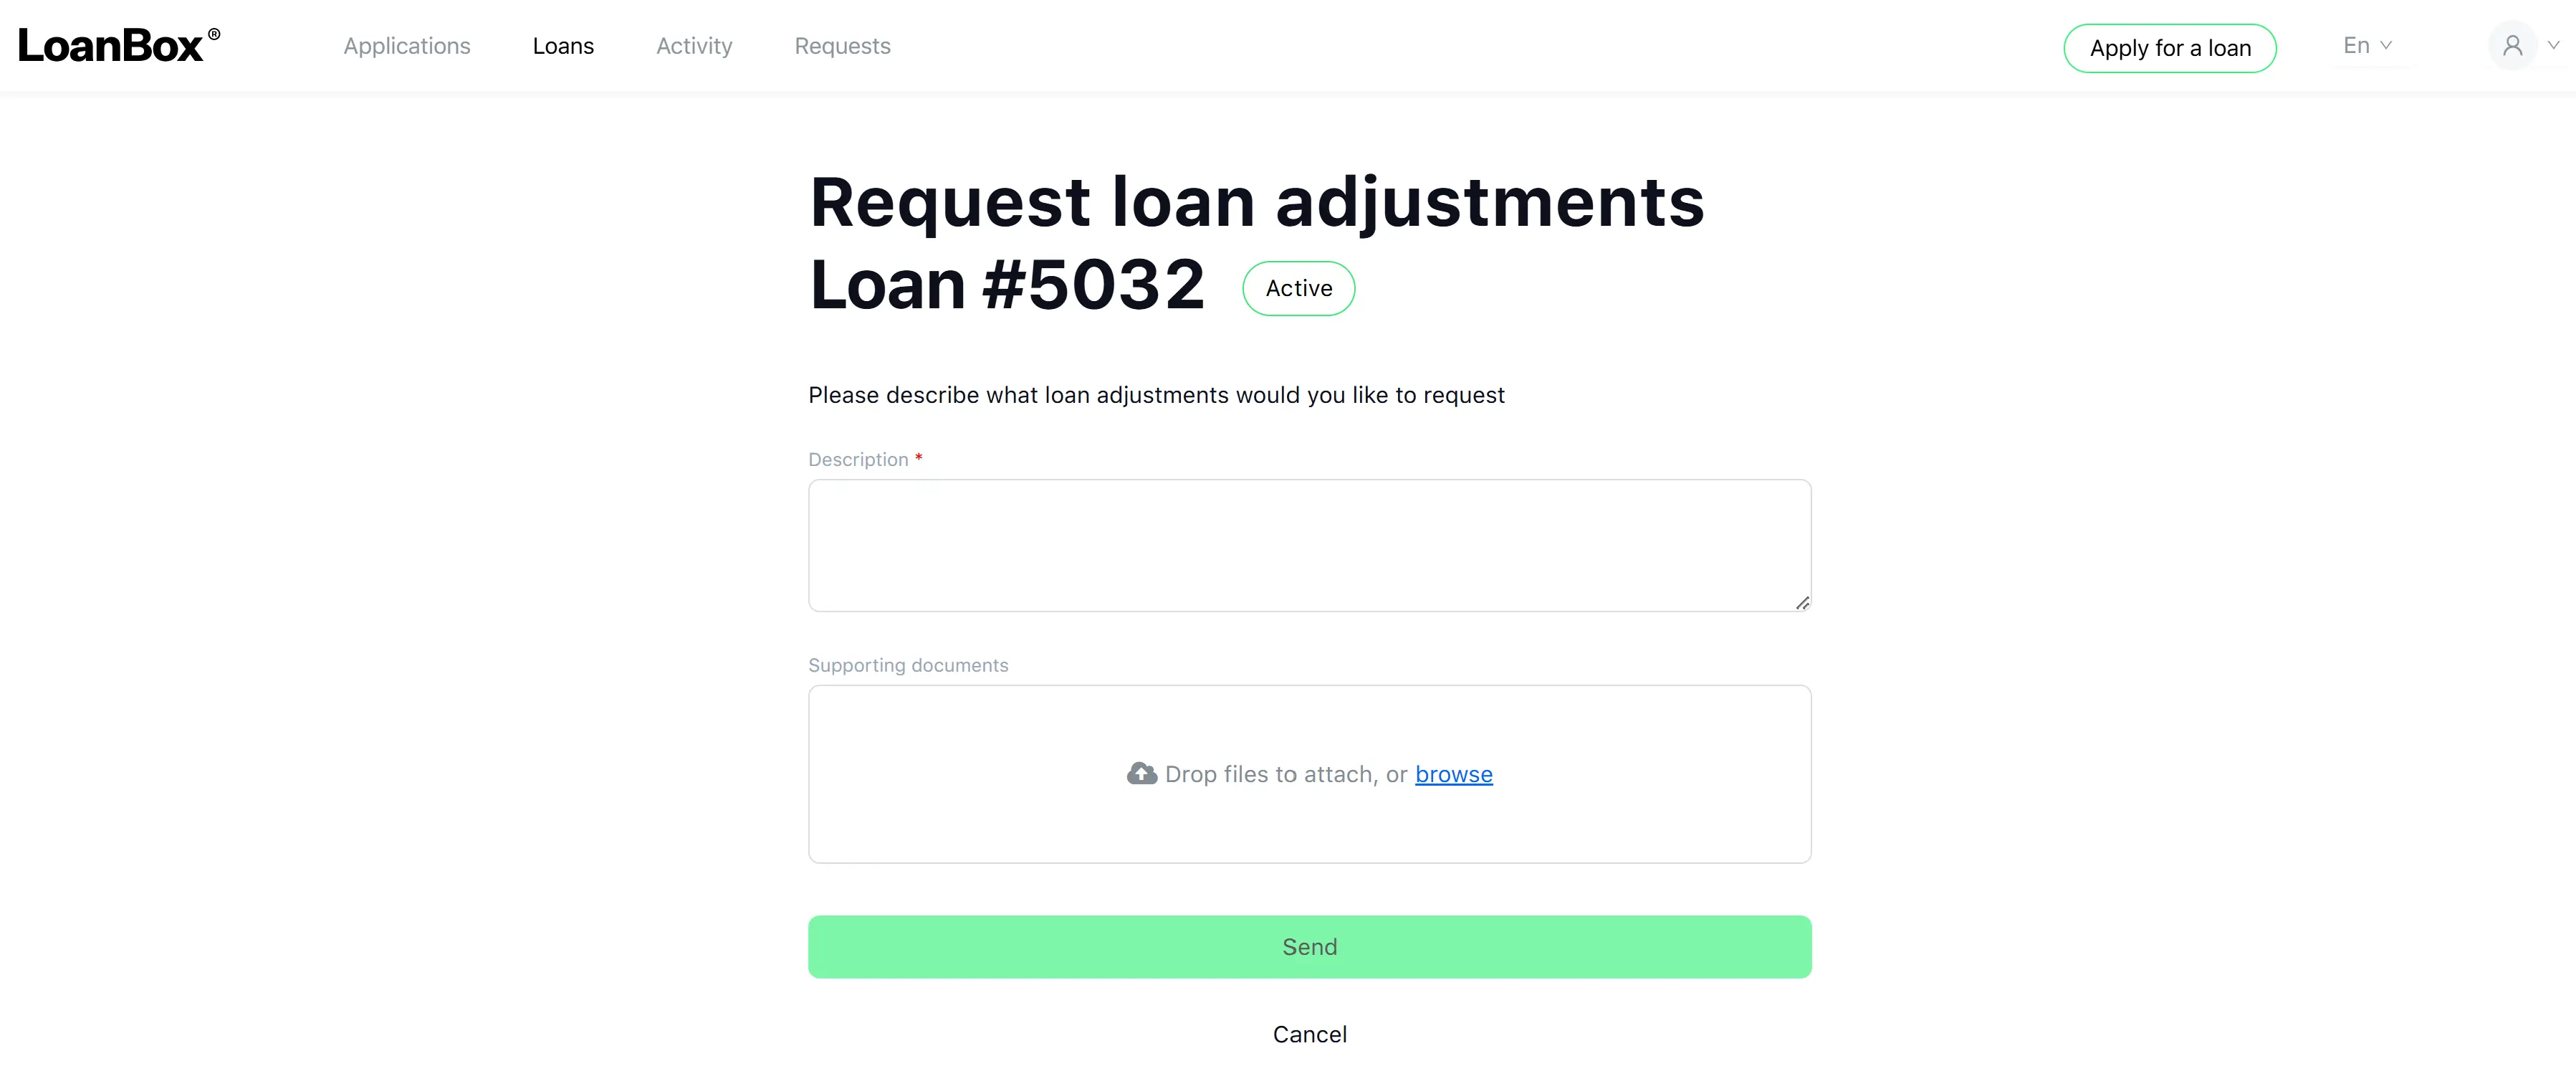
The borrower’s request form captures only narrative information:
| Field | Description | Type | Required | Validation | Notes |
|---|---|---|---|---|---|
| Loan reference | The loan the request applies to | Hidden | — | — | Filled automatically; the loan number and current status are also displayed read-only at the top of the form |
| Description | A free-text explanation of what the borrower wants to change and why | Multi-line text | Yes | Maximum 3,000 characters | The lender uses this text to decide which restructuring option to apply |
| Attachments | Supporting documents (e.g. proof of hardship, payslips, statements) | File upload | No | Each file up to 20 MB | Multiple files allowed |
The form blocks submission if the borrower already has an active request for the same loan (status For review, Under review, Approved, or Signing). In that case, the form shows the message “You already have a loan adjustments request. Please wait until the final decision.”
The three restructuring options — and the type-specific fields associated with each — are not chosen by the borrower. They are selected by the lender’s credit officer when reviewing the request:
| Restructuring option | What the lender configures | What the borrower sees |
|---|---|---|
| Extend maturity date | New term (in periods) and the approach used to extend | The updated maturity date and the recalculated amortisation schedule |
| Amend interest rate | New interest rate type and new interest rate | The updated interest rate and the recalculated amortisation schedule |
| Apply payment holiday | Number of periods during which payments are suspended | The suspended periods on the amortisation schedule |
Buttons
- Send — submit the request.
- Cancel — discard and return to the loan card.
End-to-end process flow
Step 1. Open the request form.
The borrower clicks Request loan adjustment on the loan card. The system shows the form with the loan reference and current loan status pre-filled.
Step 2. Describe the request and attach documents.
The borrower types the description of the requested change in the Description field and optionally uploads supporting documents.
Step 3. Send.
The borrower clicks Send. The system validates that no other active request exists for the same loan. If the check passes, the request is saved with the status “For review” and appears in the Requests module.
Step 4. Lender review.
A credit officer reviews the request. The system status changes to Under review.
The officer decides one of three outcomes:
- Approve — selects the restructuring option and fills in the type-specific parameters. The system recalculates the amortization schedule and generates an amendment agreement.
- Request updates — sends the request back to the borrower with a reason (see step 5).
- Decline — closes the request with a decline reason.
Step 5. Update requested (optional).
If the lender asks for more information, the request status changes to Update requested, and a task titled “Update the loan adjustment request” appears in the borrower’s Activities. The borrower has 72 hours to update the description and attachments and resubmit; if the deadline passes, the request is automatically declined.
Step 6. Signing.
Once the lender approves and the amendment agreement is ready, the request moves to the Signing status. A signing task appears in the borrower’s Activities. The borrower reviews the new schedule and signs the amendment agreement within the configured deadline.
- If the borrower signs in time, the request moves to Approved and then to Applied once the new terms take effect on the loan.
- If the borrower does not sign before the deadline, the request is automatically declined.
Step 7. Result.
When the request reaches the Applied status, the loan operates under the new terms. When the request reaches status Declined, the loan terms remain unchanged, and the decline reason is shown on the request detail screen.